


Table of contents
- 1. Develop Azure Compute Solutions
- 1.1 Implement IaaS solutions
- Azure virtual machines
- Azure Resource Manager (ARM)
- Infrastructure As Code (IaC)
- Azure Resource Manager (ARM) Templates
- Template file
- Sample Template file
- Exporting Templates of existing resources
- Similarly, I downloaded the template for Azure Disk being used by my subscription.
- Defining multi-tiered templates
- Share templates with other users
- Resource
- Parameters
- Variables
- Conditional deployment
- ARM Template Functions
- Outputs
- Deployment Mode
- PRACTICAL 02: Create and deploy Azure Resource Manager templates by using Visual Studio Code
- Azure Container Registry (ACR)
- Azure Container Instances (ACI)
- Features
- Container Groups
- Deployment
- There are two common ways to deploy a multi-container group: ARM template or a YAML file.
- Azure Container Instances allocates resources such as CPUs, memory, and optionally GPUs to a container group by adding the resource requests of the instances in the group.
- Container groups share an IP address and a port namespace on that IP address. Because containers within the group share a port namespace, port mapping isn't supported. Containers within a group can reach each other via localhost on the ports that they have exposed, even if those ports aren't exposed externally on the group's IP address.
- Storage
- Specify external volumes to mount within a container group. Then map those volumes into specific paths within the individual containers in a group. Supported volumes include:
- Common scenarios
- PRACTICAL 04: Deploy a container instance by using the Azure CLI
- Run containerized tasks with restart policies
- Set environment variables in container instances
- Mount an Azure file share in Azure Container Instances
- Container Troubleshooting
All the notes on this page have been taken from Microsoft's learning portal - learn.microsoft.com. If any of this material is copyrighted, please let me know in the comments below and I will remove it. The main goal here is to learn and understand the concepts for developing solutions for Microsoft Azure. These notes may be helpful to prepare for the certification AZ-204: Developing Solutions for Microsoft Azure
1. Develop Azure Compute Solutions
1.1 Implement IaaS solutions
Azure virtual machines
An Azure virtual machine gives you the flexibility of virtualization without having to buy and maintain the physical hardware that runs it.
Typically, you choose a VM when you need more control over the computing environment than the other choices offer. However, you still need to maintain the VM by performing tasks, such as configuring, patching, and installing the software that runs on it.
Design considerations for virtual machine creation
1. Availability
Azure supports a single instance virtual machine SLA o 99.9% provided you deploy the VM with premium storage for all disks.
Below are the virtual machine availability options:
a. Availability zones
Azure availability zones are physically separate locations within each Azure region. There are three Availability Zones per supported Azure region.
Ideally, you should co-locate your compute, storage, networking, and data resources within a zone and replicate in other zones. Azure services that support Availability Zones fall into two categories:
Zonal services: here a resource is pinned to a specific zone (e.g VMs, managed disks, standard IP addresses)
Zone-redundant services: here the Azure platform replicates automatically across zones (e.g zone-redundant storage, SQL Database)
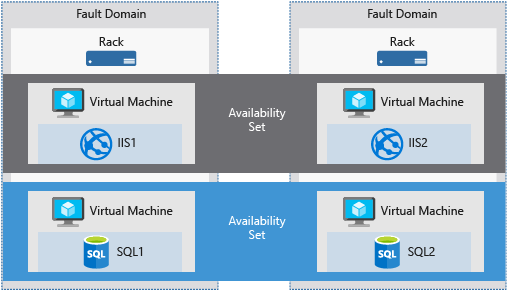
b. Availability sets
A logical grouping of VMs that allows Azure to understand how your application is built to provide for redundancy and availability. Availability Set allows a customer to spread their virtual machines across multiple Fault Domains and Update Domains within a data center, to ensure availability
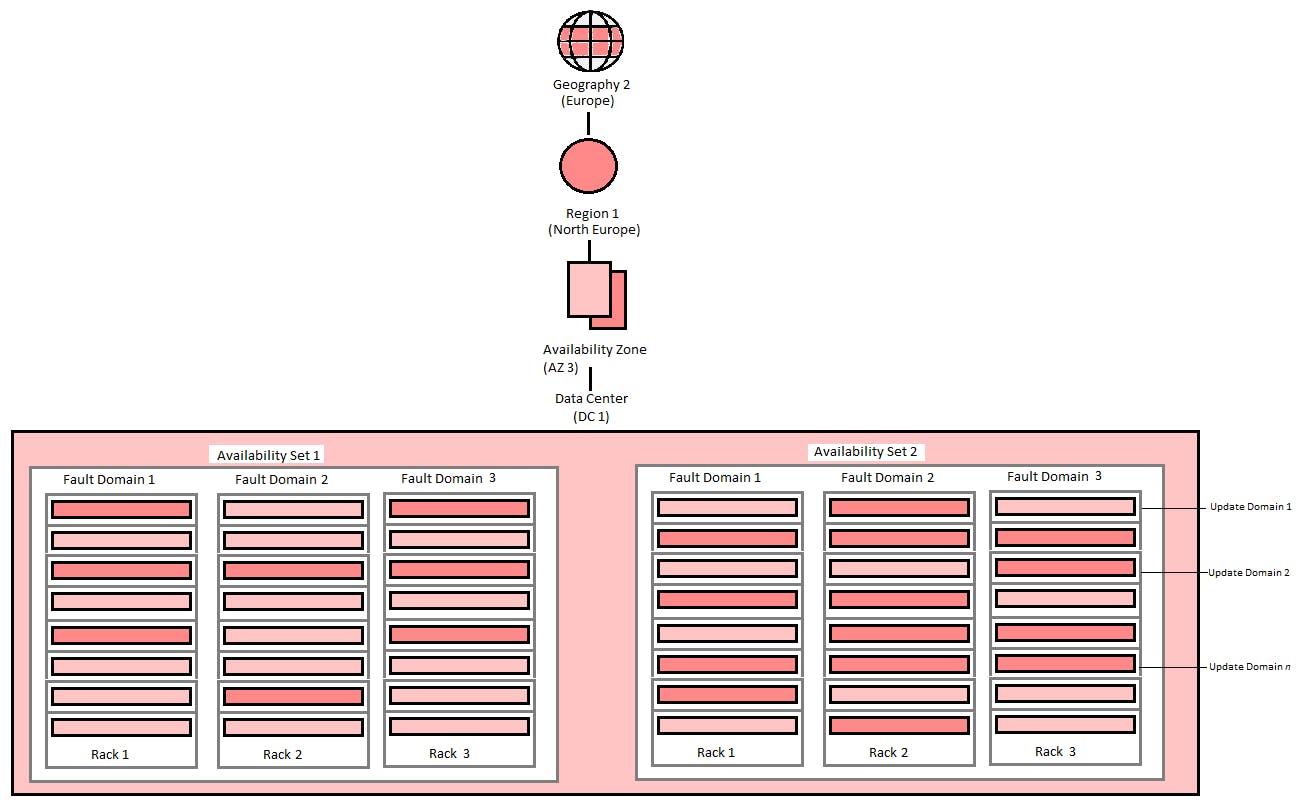
Fault domains: A fault domain is a logical group of underlying hardware that share a common power source and network switch, similar to a rack within an on-premise datacenter.
Update domains: Update domains enable targeting specific sets of hardware for maintenance or rebooting.
c. Virtual machine scale sets
Create and manage a group of load balanced VMs. Number of VM instances can automatically increase or decrease in response to demand or a defined schedule.
d. Load balancer
A Layer-4 (TCP, UDP) load balancer that provides high availability by distributing incoming traffic among healthy VMs.
You define a front-end IP configuration that allows your load balancer and applications to be accessible over the internet. VMs connect to a load balancer using their virtual network interface card (NIC).
2. VM Size
We can decide the appropriate VM size based on the type of workload our VM needs to run.
a. General Purpose VM:
This has a balanced CPU-to-memory ratio.
Ideal for:
Testing and development
Small to medium databases
Low to medium traffic web servers
b. Compute Optimized VM
This has high CPU-to-memory ratio.
Ideal for:
Medium traffic web servers
Network appliances
Batch processes
Application servers
c. Memory Optimized VM
High memory-to-CPU ratio.
Ideal for:
Relational Database servers
Medium to large caches
In Memory analytics
d. Storage Optimized VM
High disk throughput and IO
Ideal for:
Big Data,
Sql and NoSql databases,
Data warehousing
Large transactional databases
e. GPU VM
Specialized virtual machines available with single or multiple GPUs.
Ideal for:
Heavy graphic rendering
Video editing
Model training and inferencing (ND) with deep learning
f. High Performance Compute
The fastest and most powerful CPU virtual machines with high-throughput network interfaces (RDMA)
3. VM limits
Your subscription has default quota limits in place that could impact the deployment of many VMs for your project. The current limit on a per subscription basis is 20 VMs per region. Limits can be raised by filing a support ticket requesting an increase.
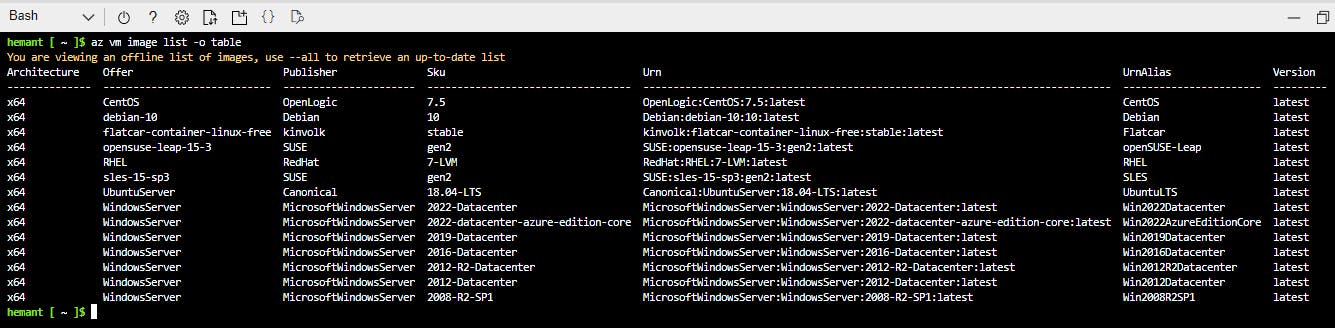
4. VM image
You can either use your own image, or you can use one of the images in the Azure Marketplace. You can get a list of images in the marketplace by using the az vm image list command in Azure CLI.
5. VM disks
Azure provides two types of disks:
Standard disks: Backed by HDDs, and delivers cost-effective storage while still being performant. Ideal for a cost effective dev and test workload
Premium disks: Backed by SSD-based, high-performance, low-latency disk. Perfect for VMs running production workload.
There are two options for disk storage accounts:
Managed disks: Newer and recommended disk storage model, they are managed by Azure. You specify the size of the disk, max 4TB. You don't have to worry about storage account limits, which makes managed disks easier to scale out.
Unmanaged disks: You are responsible for the storage accounts that hold the virtual hard disks (VHDs) that correspond to your VM disks. You pay the storage account rates for the amount of space you use.
PRACTICAL 01: Create a virtual machine by using the Azure CLI and install NGINX web server in it
Pre-requisite: You should have an active Azure subscription.
Step 1: Login to the Azure portal - https://portal.azure.com/
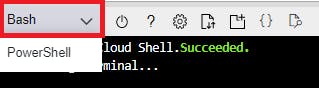
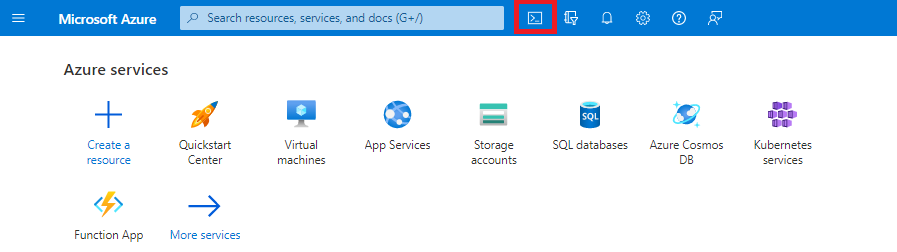
Step 2: Open Cloud Shell

Step 3: After the shell opens, select the Bash environment
Step 4: Create a resource group using the az group create command.
az group create --name vm-rg --location "South Central US"
--name vm-rg is how we specify the name of our resource group--location "South Central US" is how we specify the location where resource group is to be created (you can give the location nearest to you)
The result of above command looks like this -

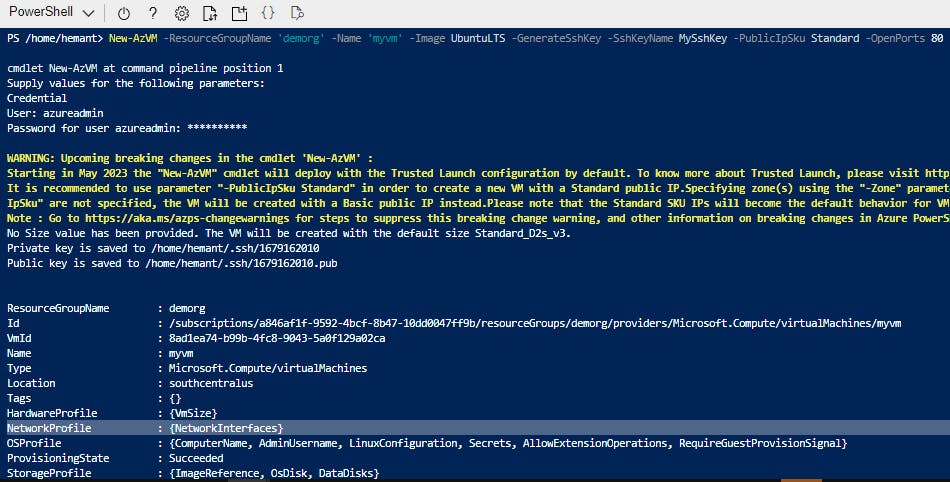
Powershell equivalent
New-AzResourceGroup -Name vm-rg -Location "South Central US"
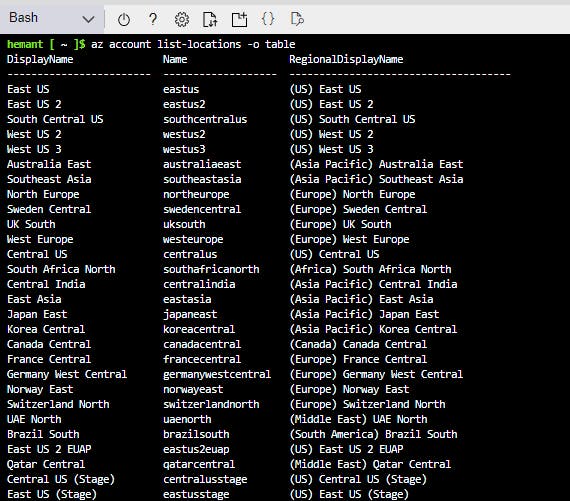
Just FYI, we can get the list of locations by using the below command
az account list-locations -o table
Powershell equivalent
Get-AzLocation
Step 5: Create a VM with the az vm create command. The command below creates a Linux VM named demovm with an admin user named azureadmin.
az vm create \
  --resource-group vm-rg \
  --name demovm \
  --image UbuntuLTS \
  --generate-ssh-keys \
  --admin-username azureadmin \
  --public-ip-sku Standard
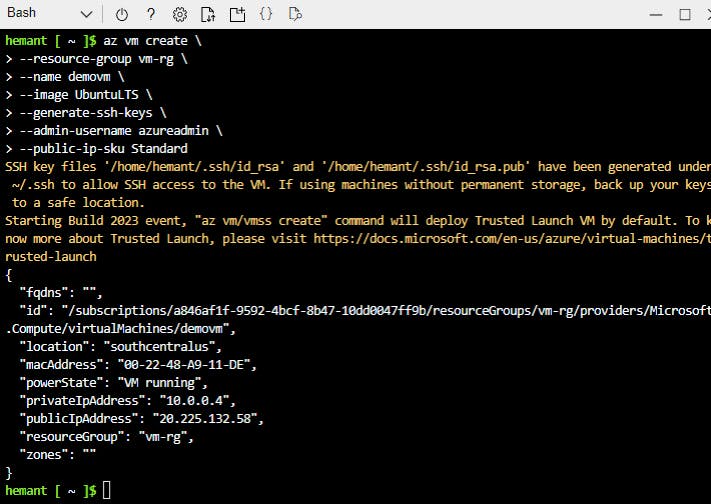
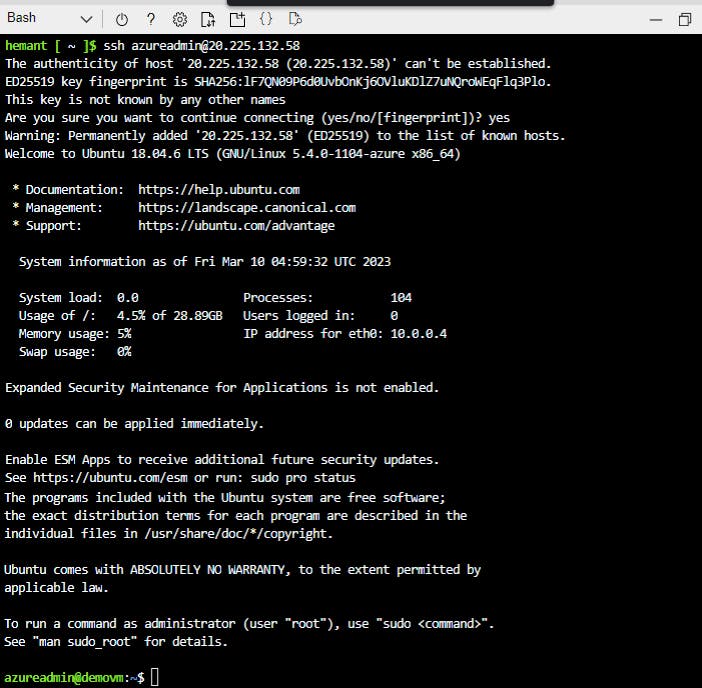
Note the public IP address for our VM. In this case it is displayed as 20.225.132.58
Here,--resource-group vm-rg provides vm-rg as the resource group under which we want to create the vm--name demovm provides demovm as the name we want to give to the VM--image UbuntuLTS provides the OS image we want for this VM--generate-ssh-keys is an optional parameter to generate SSH public and private key files. These files can later be used by VM to authenticate incoming connection requests. The key files are stored in the ~/.ssh directory unless specified otherwise with the --ssh-dest-key-path option.--admin-username azureadmin gives azureadmin as the name we want to give to the default admin user.--public-ip-sku Standard creates a public IP address for our VM using the Standard SKU. The alternative is to use a Basic SKU, which is deprecated. Public IP address created using Standard SKU has better security and availability features than Basic SKU.
Powershell equivalent
New-AzVm `
    -ResourceGroupName 'myResourceGroup' `
    -Name 'myVM' `
    -Image UbuntuLTS `
    -GenerateSshKey -SshKeyName MySshKey `
    -PublicIpSku Standard `
    -OpenPorts 80,3389 `
    -Location 'East US' `
    -VirtualNetworkName 'myVnet' `
    -SubnetName 'mySubnet' `
    -SecurityGroupName 'myNetworkSecurityGroup' `
    -PublicIpAddressName 'myPublicIpAddress' `
We can get the list of all OS images using below command
az vm image list -o table
Powershell equivalent
Get-AzVMImage -Location "Central US" -PublisherName "MicrosoftWindowsServer" -Offer "windowsserver" -Skus "2012-R2-Datacenter"
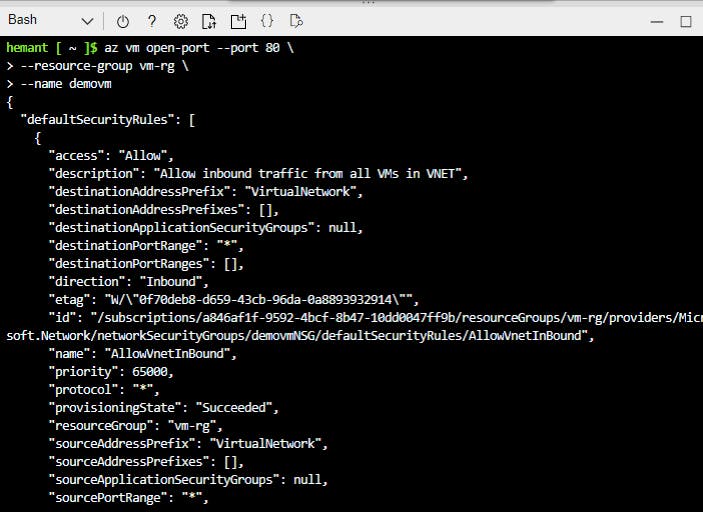
Step 6: Open port 80 on VM to allow HTTP
When you create a Linux VM in Azure, only SSH connections are opened by default. We can use az vm open-port to open TCP port 80. Later we will install an NGINX web server on the VM and access it via this port.
az vm open-port --port 80 \
  --resource-group vm-rg \
  --name demovm
Here, --resource-group vm-rg and --name demovm are the names of our resource group and vm respectively where we want to open port 80
Step 7: Login to your VM via SSH
ssh azureadmin@<publicIPaddress>
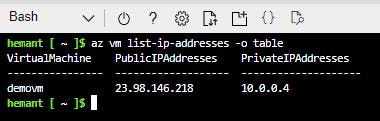
If you want to find out IP address of your vm before running ssh, you can use below command
az vm list-ip-addresses -o table
Powershell equivalent
Get-AzPublicIpAddress
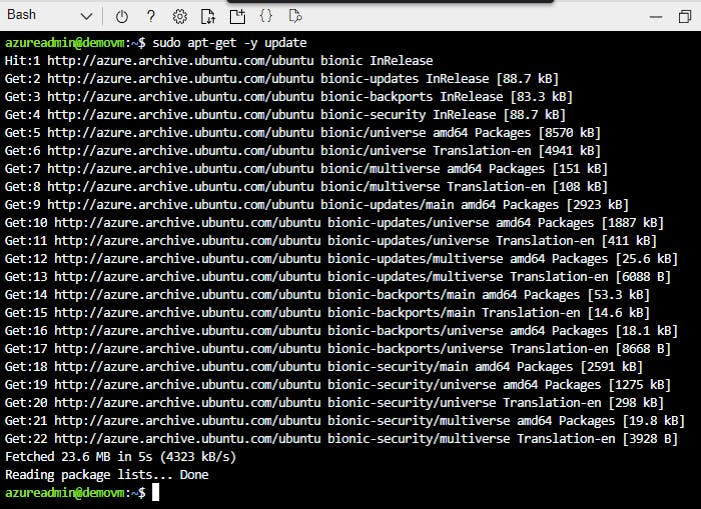
Step 8: Install NGINX web server
Update your package sources and then install the latest NGINX package. The -y flag is to automatically give Yes to all prompts.
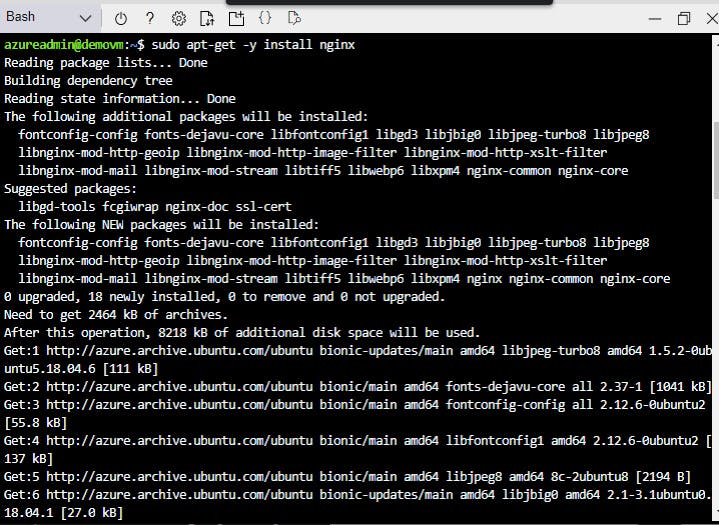
sudo apt-get -y update
sudo apt-get -y install nginx
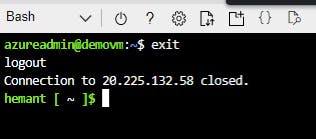
Finally, exit the SSH session
exit
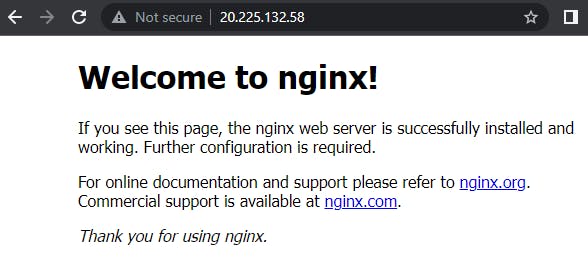
Step 9: View the web server in action
Open a web browser and type the public IP address of your VM. You should see a page like below.
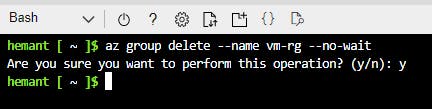
Step 10: Cleanup Azure resources
Let us delete our resource group vm-rg from our account to avoid incurring expenses on the VM resources. Deleting the resource group deletes all resources within it as well.
az group delete --name vm-rg --no-wait
Powershell equivalent
Remove-AzResourceGroup -Name "MyResourceGroup"
Virtual machine extensions
Extensions For Windows VMs
1. Run custom scripts
The Custom Script Extension helps you configure workloads on the VM by running your script when the VM is provisioned.
2. Deploy and manage configurations
The Powershell Desired State Configuration (DSC) extension helps you set up DSC on a VM to manage configurations and environments.
3. Collect diagnostics data
The Azure Diagnostics extesion helps you configure the VM to collect diagnostics data that can be used to monitor the health of your application.
For Linux VMs, Azure supports cloud-init across most Linux distributions that support it and works with all the major automation tooling like Ansible, chef, SaltStack, and Puppet
Azure compute unit (ACU)
The concept of the Azure Compute Unit (ACU) provides a way of comparing compute (CPU) performance across Azure SKUs. ACU is currently standardized on a Small (Standard_A1) VM being 100 and all other SKUs then represent approximately how much faster that SKU can run a standard benchmark
| SKU Family | ACU \ vCPU | vCPU: Core |
| A1_v2 - A8_v2 | 100 | 1:1 |
| A2m_v2 - A8m_v2 | 100 | 1:1 |
| B | Varies | 1:1 |
| D1 - D14 | 160 - 250 | 1:1 |
| D1_v2 - D15_v2 | 210 - 250* | 1:1 |
| DS1 - DS14 | 160 - 250 | 1:1 |
| DS1_v2 - DS15_v2 | 210 - 250* | 1:1 |
| D_v3 | 160 - 190* | 2:1*** |
| Ds_v3 | 160 - 190* | 2:1*** |
| Dav4 | 230 - 260** | 2:1**** |
| Dasv4 | 230 - 260** | 2:1**** |
| Dv4 | 195 - 210 | 2:1*** |
| Dsv4 | 195 - 210 | 2:1*** |
| Ddv4 | 195 -210* | 2:1*** |
| Ddsv4 | 195 - 210* | 2:1*** |
| E_v3 | 160 - 190* | 2:1*** |
| Es_v3 | 160 - 190* | 2:1*** |
| Eav4 | 230 - 260** | 2:1**** |
| Easv4 | 230 - 260** | 2:1**** |
| Ev4 | 195 - 210 | 2:1*** |
| Esv4 | 195 - 210 | 2:1*** |
| Edv4 | 195 - 210* | 2:1*** |
| Edsv4 | 195 - 210* | 2:1*** |
| F2s_v2 - F72s_v2 | 195 - 210* | 2:1*** |
| F1 - F16 | 210 - 250* | 1:1 |
| F1s - F16s | 210 - 250* | 1:1 |
| FX4 - FX48 | 310 - 340* | 2:1*** |
| G1 - G5 | 180 - 240* | 1:1 |
| GS1 - GS5 | 180 - 240* | 1:1 |
| H | 290 - 300* | 1:1 |
| HB | 199 - 216** | 1:1 |
| HC | 297 - 315* | 1:1 |
| L4s - L32s | 180 - 240* | 1:1 |
| L8s_v2 - L80s_v2 | 150 - 175** | 2:1**** |
| M | 160 - 180 | 2:1*** |
| Mv2 | 240 - 280 | 2:1*** |
| NVv4 | 230 - 260** | 2:1**** |
Performance Consistency
D, E, and F series VMs may have the processor frequency set to a lower level when running on newer hardware to help achieve better performance consistency across hardware updates. (The specific frequency setting varies based on the processor the VM series was first released on and the comparable performance of the current hardware.)
A series VMs use an older model based on time slicing newer hardware to deliver performance consistency across hardware versions.
B series VMs are burstable and use a credit system (described in their documentation to achieve expected performance.
These different processor settings for VMs are a key part of Azure's effort to provide consistent performance and minimize the impact of changes in underlying hardware platform outside of our customer’s control.
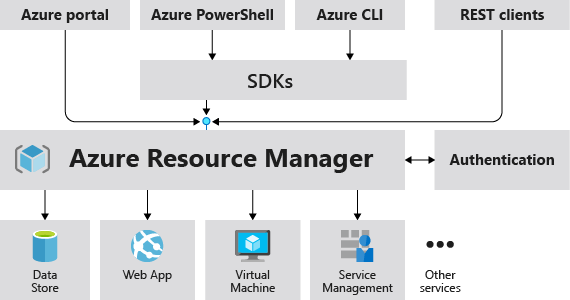
Azure Resource Manager (ARM)
Azure Resource Manager is the deployment and management service for Azure. It provides a management layer that enables you to create, update, and delete resources in your Azure subscription.
Infrastructure As Code (IaC)
It is the process of managing and provisioning cloud resources through machine-readable definition files (e.g. JSON files) rather than physical hardware configuration or interactive configuration tools.
You write a script that will setup cloud services for you.
IaCs can either be:
Declarative - You define exactly what you want, and you get exactly that
Imperative - You define what you generally want, and the service will guess what you want.
Azure Resource Manager (ARM) Templates
ARM templates are JSON files that define Azure resources you want to provision and Azure services you want to configure.
Advantages of using ARM templates:
1. Declarative syntax: Azure Resource Manager templates allow you to create and deploy an entire Azure infrastructure declaratively.
2. Repeatable results: Reliably deploy your infrastructure throughout development. Templates are idempotent, which means you can deploy the same template many times and get the same resource types in the same state.
3. Orchestration: You don't have to worry about the complexities of ordering operations. Resource Manager orchestrates the deployment of interdependent resources so they're created in the correct order.
Template file
$schema - describes the properties that are available within a template content
contentVersion - the version of the template. You can provide any value for this element.
Parameters - Provide values during deployment that allow the same template to be used with different environments
Variables - Define values that are used in your templates. They can be constructed from parameter values
functions - Create customized functions that simplify your template
Resources - Specify the resources to deploy
Outputs - Return values from the deployed resources
{
"$schema": "http://schema.management.azure.com/schemas/2019-04-01/deploymentTemplate.json#",
"contentVersion": "1.0.0.0",
"parameters": {},
"variables": {},
"functions": [],
"resources": [],
"outputs": {}
}
Sample Template file
Below is a template for creating a storage account
{
"$schema": "http://schema.management.azure.com/schemas/2019-04-01/deploymentTemplate.json#",
"contentVersion": "1.0.0.0",
"parameters": {},
"variables": {},
"resources": [
  {
    "type": "Microsoft.Storage/storageAccounts",
    "apiVersion": "2019-04-01",
    "name": "mystorageaccount",
    "location": "westus",
    "sku": {
      "name": "Standard_LRS"
    },
    "kind": "StorageV2",
    "properties": {}
  }
],
"outputs": {}
}
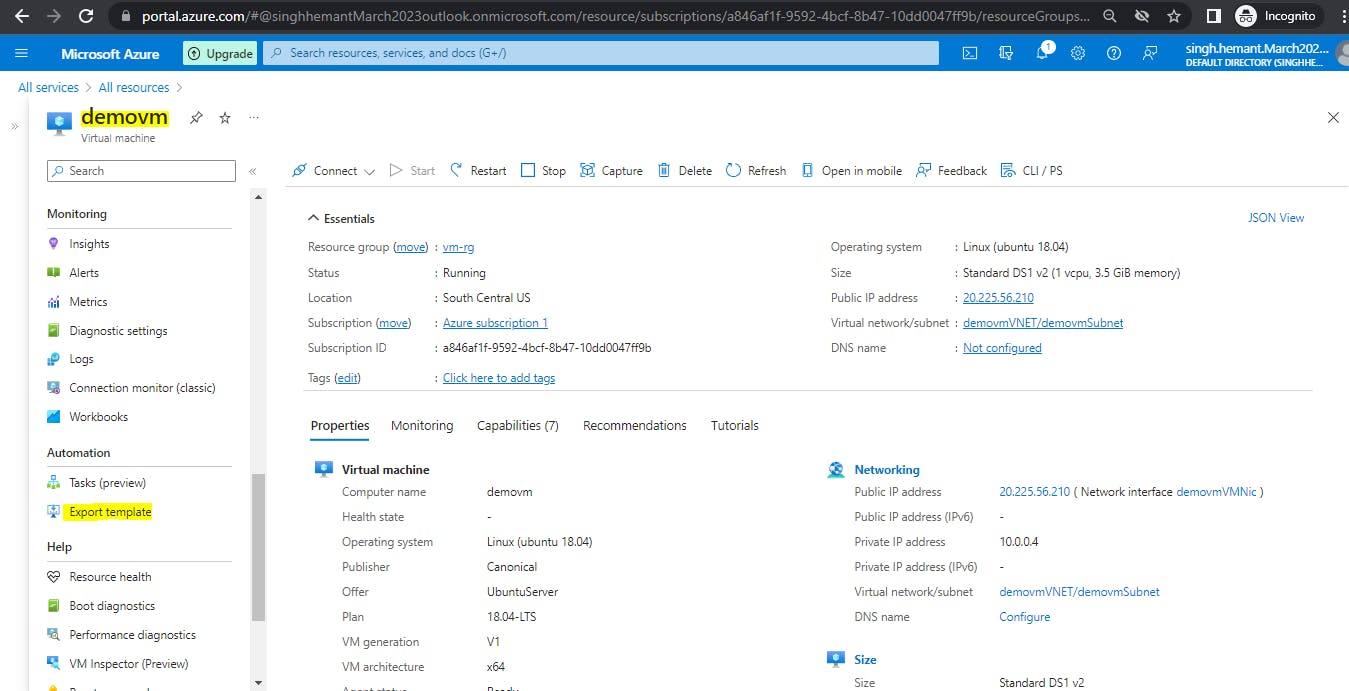
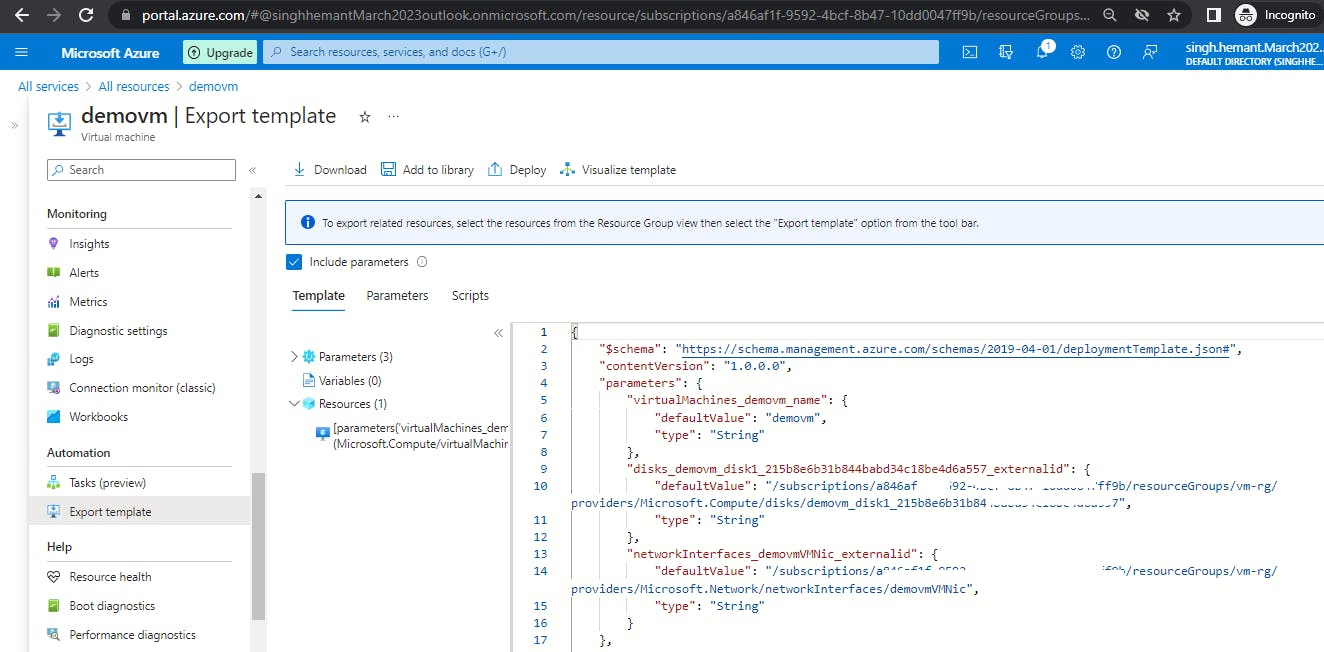
Exporting Templates of existing resources
We can easily get the template for our existing resources by using the Export Template option. For example, if we open the demo VM we created some time back, and use the Export Template option, here is what we will see.
Similarly, I downloaded the template for Azure Disk being used by my subscription.
{
    "$schema": "https://schema.management.azure.com/schemas/2019-04-01/deploymentTemplate.json#",
    "contentVersion": "1.0.0.0",
    "parameters": {
        "my_disk_name": {
            "defaultValue": "my_disk",
            "type": "String"
        }
    },
    "variables": {},
    "resources": [
        {
            "type": "Microsoft.Compute/disks",
            "apiVersion": "2022-07-02",
            "name": "[parameters('dmy_disk_name')]",
            "location": "southcentralus",
            "sku": {
                "name": "Premium_LRS",
                "tier": "Premium"
            },
            "properties": {
                "osType": "Linux",
                "hyperVGeneration": "V1",
                "supportsHibernation": true,
                "supportedCapabilities": {
                    "diskControllerTypes": "SCSI, NVMe",
                    "acceleratedNetwork": true,
                    "architecture": "x64"
                },
                "creationData": {
                    "createOption": "FromImage",
                    "imageReference": {
                        "id": "/Subscriptions/mysubscriptionid/Providers/Microsoft.Compute/Locations/southcentralus/Publishers/canonical/ArtifactTypes/VMImage/Offers/ubuntuserver/Skus/18.04-lts/Versions/18.04.202303080"
                    }
                },
                "diskSizeGB": 30,
                "diskIOPSReadWrite": 120,
                "diskMBpsReadWrite": 25,
                "encryption": {
                    "type": "EncryptionAtRestWithPlatformKey"
                },
                "networkAccessPolicy": "AllowAll",
                "publicNetworkAccess": "Enabled",
                "diskState": "Attached",
                "tier": "P4"
            }
        }
    ]
}
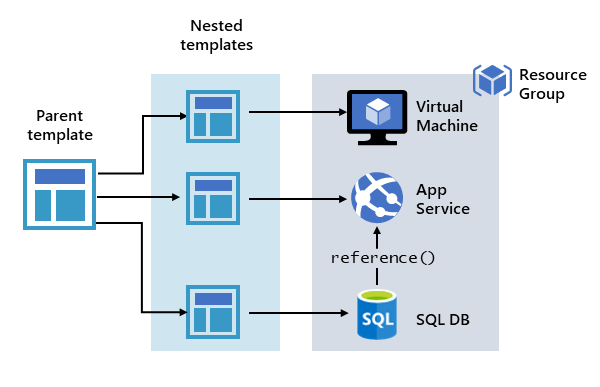
Defining multi-tiered templates
You don't have to define your entire infrastructure in a single template. Often, it makes sense to divide your deployment requirements into a set of targeted, purpose-specific templates. You can easily reuse these templates for different solutions. To deploy a particular solution, you create a master template that links all the required templates. The following image shows how to deploy a three-tier solution through a parent template that includes three nested templates.
Share templates with other users
Template specs enable you to store a template as a resource type. You use role-based access control to manage access to the template spec. Users with read access to the template spec can deploy it, but not change the template.
This approach means you can safely share templates that meet your organization's standards.
Resource
An Azure Resource you want to provision. It has the following main properties:
type: the type of resource. It follows the format of {ResourceProvider}/ResourceType
apiVersion: version of the REST API to use for the resource. Each resource provider publishes its own API versions
name: name of the resource
location: the region where the resource will be deployed
other properties specific to that resource
  {
  "$schema": "http://schema.management.azure.com/schemas/2019-04-01/deploymentTemplate.json#",
  "contentVersion": "1.0.0.0",
  "parameters": {},
  "variables": {},
  "functions": [],
  "resources": [
    {
      "type": "Microsoft.Storage/storageAccounts",
      "apiVersion": "2019-04-01",
      "name": "mystorageaccount",
      "location": "westus",
      "sku": {
        "name": "Standard_LRS"
      },
      "kind": "StorageV2",
      "properties": {}
    }
  ],
  "outputs": {}
  }
Parameters
Allow you to pass variables to your ARM template
A few of the properties used in a parameter:
type: the expected data type of the input value. It could be
string,securestring,int,bool,object,secureObject, andarray.defaultValue: if no value is provided, then this value will be used
allowedValues: an array of allowed values
minValue: the minimal possible value
maxValue: the maximum possible value
minLength: the minimum length of characters or array
maxLength: the maxium length of characters or array
description: the description that will be displayed in the Azure Portal
Below we create two params accountName and newOrExisting, and then we use them in resources:
{
  "$schema": "https://schema.management.azure.com/schemas/2019-04-01/deploymentTemplate.json#",
  "contentVersion": "1.0.0.0",
  "parameters": {
    "accountName": {
          "type": "string",
          "defaultValue": "MyAccount",
          "metadata": {
             "description": "Account Name"
           },
           "minLength": 3,
           "maxLength": 24
    },
    "newOrExisting": {
          "type": "string",
          "defaultValue": "new",
          "allowedValues": [
                "new",
                "existing"
          ]
    },
  "variables": {},
  "functions": [],
  "resources": [
    {
          "condition": "[equals(parameters('newOrExisting'), 'new')]",
          "type": "Microsoft.Storage/storageAccounts",
          "apiVersion": "2019-06-01",
          "name": "[parameters('storageAccountName')]",
          "location": "southcentralus",
    }
  ],
  "outputs": {}
}
Variables
You use variables to simplify your template. Rather than repeating complicated expressions throughout your template, you define a variable that contains the complicated expression. Then, you use that variable as needed throughout your template.
In the example below, we define a variable named storageName which has a complex expression, which is used in the resource.
"parameters": {
  "storageNamePrefix": {
    "defaultValue": "disk_",
    "type": "string"
  }
},
"variables": {
  "storageName": "[concat(toLower(parameters('storageNamePrefix')), uniqueString(resourceGroup().id))]"
},
"resources": [
  {
    "type": "Microsoft.Storage/storageAccounts",
    "name": "[variables('storageName')]",
    ...
  }
]
Variables can be nested. In the below example, we define a nested variable env which defines different values for test and prod environments. The value of envName is taken at runtime from parameters. Finally, the location of storage resource is decided based on the env using the format variables()[].property. In our case, it becomes variables('env')['envName'].location. For example, if the envName is provided as "prod", then variables('env')['prod'].location will return eastus
"parameters":{
    "envName": {
        "type": "string",
        "allowedValues":[
            "test",
            "prod"
        ]
    }
},
"variables": {
  "env": {
        "test": {
            "instanceSize": "Small",
            "instanceCount": 1,
            "location": "southcentralus"
        },
        "prod": {
            "instanceSize": "Large",
            "instanceCount": 4,
            "location": "eastus"
        }
   }
},
"resources": [
   "type": "Microsoft.Storage/storageAccounts",
   "location": "[variables('env')[parameters('envName').location].]",
    ...
]
Conditional deployment
We can use the condition element to specify whether or not to create a resource. In the below example, we use condition to deploy a new storage account or use an existing storage account. It contains a parameter named newOrExisting which is used as a condition in the resources section.
{
  "$schema": "https://schema.management.azure.com/schemas/2019-04-01/deploymentTemplate.json#",
  "contentVersion": "1.0.0.0",
  "parameters": {
    "storageAccountName": {
      "type": "string"
    },
    "location": {
      "type": "string",
      "defaultValue": "[resourceGroup().location]"
    },
    "newOrExisting": {
      "type": "string",
      "defaultValue": "new",
      "allowedValues": [
        "new",
        "existing"
      ]
    }
  },
  "functions": [],
  "resources": [
    {
      "condition": "[equals(parameters('newOrExisting'), 'new')]",
      "type": "Microsoft.Storage/storageAccounts",
      "apiVersion": "2019-06-01",
      "name": "[parameters('storageAccountName')]",
      "location": "[parameters('location')]",
      "sku": {
        "name": "Standard_LRS",
        "tier": "Standard"
      },
      "kind": "StorageV2",
      "properties": {
        "accessTier": "Hot"
      }
    }
  ]
}
When the parameter newOrExisting is set to new, the condition evaluates to true. The storage account is deployed. However, when newOrExisting is set to existing, the condition evaluates to false and the storage account isn't deployed.
ARM Template Functions
Any function The
Anyfunction is available in Bicep (alternative to JSON for creating templates). It is used to suppress issues around data type warnings. It returns a value that is compatible with any data type.Below example shows how to use the
any()function to provide numeric values as strings.requests: { cpu: any('0.5') memoryInGB: any('0.7') }Array functions like
concat,contains,first,indexOf,length,max,rangeetcComparison functions like
coalesce,equals,less,greater,greaterOrEqualsetcDate functions like
dateTimeAdd,dateTimeFromEpoch,utcNowetc.Deployment value functions like
deployment,environment,parameters,variablesLogical functions like
and,bool,false,not,oretcNumeric functions like
add,copyIndex,div,floatetcObject functions like
contains,length,createObject,unionetcResource functions like
list,listKeys,pickZones,subscriptionResourceIdetcScope functions like
managementGroup,resourceGroup,subscription,tenantetcString functions like
base64,concat,contains,lengthetc
Outputs
Outputs returns values from deployed resources, so you can use them programmatically.
For example, below we are setting an output named hostname.
"outputs": {
  "hostname": {
    "type": "string",
    "value": "[reference(resourceId('Microsoft.Network/publicIPAddresses', variables('publicIPAddressName'))).dnsSettings.fqdn]"
  },
}
When the deployment succeeds, the output values are automatically returned in the results of the deployment.
To get output values from the deployment history, you can use script.
az deployment group show \
  -g <resource-group-name> \
  -n <deployment-name> \
  --query properties.outputs.hostname.value
You can add a condition to your output like this
"outputs": {
  "resourceID": {
    "condition": "[equals(parameters('publicIpNewOrExisting'), 'new')]",
    "type": "string",
    "value": "[resourceId('Microsoft.Network/publicIPAddresses', parameters('publicIPAddresses_name'))]"
  }
}
And to get output value:
az deployment group show \
  -g <resource-group-name> \
  -n <deployment-name> \
  --query properties.outputs.resourceID.value
Deployment Mode
When deploying your resources, you specify whether the deployment is an incremental update or a complete update. For both modes, Resource Manager tries to create all resources specified in the template.
Complete mode
In complete mode, Resource Manager deletes resources that exist in the resource group that aren't specified in the template.
Incremental mode
In incremental mode, Resource Manager leaves unchanged resources that exist in the resource group but aren't specified in the template. However, when redeploying an existing resource in incremental mode, specify all properties for the resource, not just the ones you're updating.
Azure CLI - use the mode parameter
az deployment group create \
  --mode Complete \
  --name MyDeployment \
  --resource-group MyResourceGroup \
  --template-file mytemplate.json
In Powershell - use the Mode parameter
New-AzResourceGroupDeployment `
  -Mode Complete `
  -Name MyDeployment `
  -ResourceGroupname MyResourceGroup `
  -TemplateFile C:\MyTemplates\storage.json
PRACTICAL 02: Create and deploy Azure Resource Manager templates by using Visual Studio Code
Pre-requisites:
An Azure account with an active subscription.
Visual Studio Code with the Azure Resource Manager Tools installed.
Azure CLI installed locally
Step 1: Create template file
Create a file named azuredeploy.json in VSCode, tyep arm and select the first option arm!, which will add the skeleton code for a template file for you.
{
    "$schema": "https://schema.management.azure.com/schemas/2019-04-01/deploymentTemplate.json#",
    "contentVersion": "1.0.0.0",
    "parameters": {},
    "functions": [],
    "variables": {},
    "resources": [],
    "outputs": {}
}
Step 2: Add storage resource
Under resources section, add a storage resource like shown below:
{
    "$schema": "https://schema.management.azure.com/schemas/2019-04-01/deploymentTemplate.json#",
    "contentVersion": "1.0.0.0",
    "parameters": {},
    "functions": [],
    "variables": {},
    "resources": [{
        "name": "storageaccount1",
        "type": "Microsoft.Storage/storageAccounts",
        "apiVersion": "2021-04-01",
        "tags": {
            "displayName": "storageaccount1"
        },
        "location": "[resourceGroup().location]",
        "kind": "StorageV2",
        "sku": {
            "name": "Premium_LRS",
            "tier": "Premium"
        }
    }],
    "outputs": {}
}
Step 3: Add parameters
Under parameters section, add a parameter storageAccountName
{
    "$schema": "https://schema.management.azure.com/schemas/2019-04-01/deploymentTemplate.json#",
    "contentVersion": "1.0.0.0",
    "parameters": {
        "storageAccountName": {
            "type": "string",
            "metadata": {
                "description": "Storage Account Name"
            }
        }
    },
    "functions": [],
    "variables": {},
    "resources": [. . . ],
    "outputs": {}
}
Azure storage account names have a minimum length of 3 characters and a maximum of 24. So, add both minLength and maxLength to the parameter and provide appropriate values.
{
    "$schema": "https://schema.management.azure.com/schemas/2019-04-01/deploymentTemplate.json#",
    "contentVersion": "1.0.0.0",
    "parameters": {
        "storageAccountName": {
            "type": "string",
            "metadata": {
                "description": "Storage Account Name"
            },
            "minLength": 3,
            "maxLength": 24
        }
    },
    "functions": [],
    "variables": {},
    "resources": [. . . ],
    "outputs": {}
}
Now, we go back to the resources section, and update the name property to use the name from the storageAccountName parameter that we just created.
{
    "$schema": "https://schema.management.azure.com/schemas/2019-04-01/deploymentTemplate.json#",
    "contentVersion": "1.0.0.0",
    "parameters": {
        "storageAccountName": {
            "type": "string",
            "metadata": {
                "description": "Storage Account Name"
            },
            "minLength": 3,
            "maxLength": 24
        }
    },
    "functions": [],
    "variables": {},
    "resources": [{
        "name": "[parameters('storageAccountName')]",
        "type": "Microsoft.Storage/storageAccounts",
        "apiVersion": "2021-04-01",
        "tags": {
            "displayName": "storageaccount1"
        },
        "location": "[resourceGroup().location]",
        "kind": "StorageV2",
        "sku": {
            "name": "Premium_LRS",
            "tier": "Premium"
        }
    }],
    "outputs": {}
}
Step 4: Add parameter file
An Azure Resource Manager template parameter file allows you to store environment-specific parameter values and pass these values in as a group at deployment time.
Go to View > Command Palette from the menu bar. In the search bar, click on Select/Create parameter file. Then select New --> All Parameters. A new file will be created, named azuredeploy.parameters.json. Provide the value of storageAccountName parameter. In my case, I am giving the value as memcryptstorageaccount1. The value should be unique.
{
    "$schema": "https://schema.management.azure.com/schemas/2019-04-01/deploymentParameters.json#",
    "contentVersion": "1.0.0.0",
    "parameters": {
        "storageAccountName": {
            "value": "memcryptstorageaccount1"
        }
    }
}
Step 5: Deploy the template
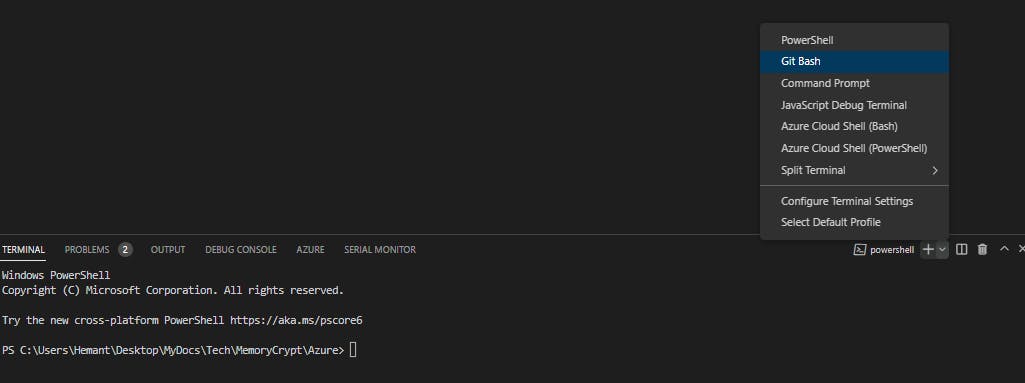
a. Open Terminal in VS code and switch to Git Bash
b. Type below command to connect to azure portal (ensure Azure CLI installed locally)
az login
This will redirect you to browser to login to azure portal. Once logged in, come back to VSCode.
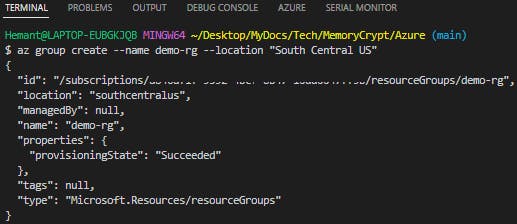
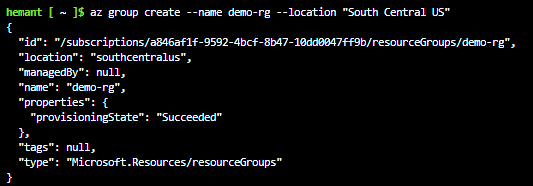
c. Create a resource group to contain the new resource
az group create --name demo-rg --location "South Central US"
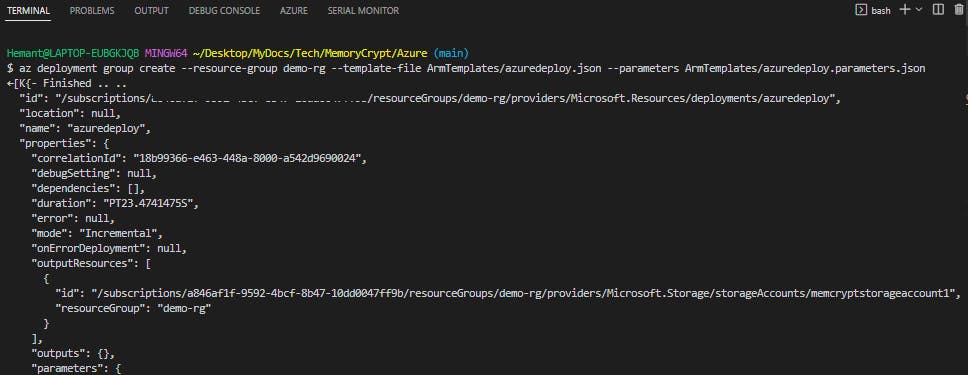
d. Use the az deployment group create command to deploy your template.
az deployment group create \
  --resource-group demo-rg \
  --template-file ArmTemplates/azuredeploy.json \
  --parameters ArmTemplates/azuredeploy.parameters.json
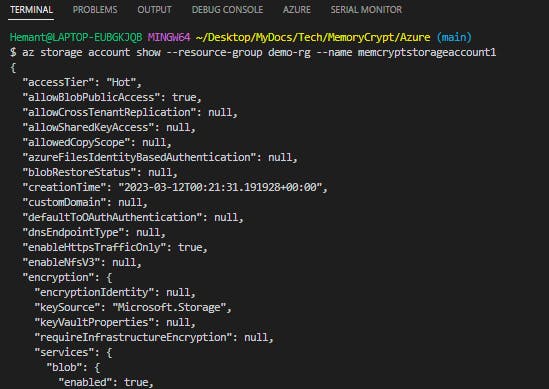
e. You can verify the deployment by running the command below. Replace <myStorageAccount> with the name you used earlier.
az storage account show --resource-group az204-arm-rg --name <myStorageAccount>
Step 6: Clean up resources
Clean up resources once you no longer need them
az group delete --name demo-rg --no-wait
Azure Container Registry (ACR)
Azure Container Registry (ACR) is a managed, private Docker registry service based on the open-source Docker Registry 2.0. Create and maintain Azure container registries to store and manage your private Docker container registries.
Use the Azure Container Registry (ACR) service with your existing container development and deployment pipelines or use Azure Container Registry Tasks to build container images in Azure.
Use Cases
Pull images from an Azure container registry to various deployment targets:
Scalable orchestration systems that manage containerized applications across clusters of hosts, including Kubernetes, DC/OS, and Docker Swarm
Azure services that support building and running applications at scale, including Azure Kubernetes Service (AKS), App Service, Batch, Service Fabric, and others.
As part of Container development workflow - For example, target a container registry from a CI/CD tool such as Azure Pipelines or Jenkins
Azure Container Registry service tiers
Azure Container Registry is available in multiple service tiers.
Basic: The Included storage and image throughput are suitable for low usage scenarios.
Standard: Increased included storage and image throughput, suitable for most production scenarios.
Premium: Highest amount of included storage, higher image throughput, and concurrent operations, enabling high-volume scenarios.
Supported images and artifacts
Each image is a read-only snapshot of a Docker-compatible container.
Azure container registries can include both Windows and Linux images
Azure Container Registry also stores Helm charts and images built to the Open Container Initiative (OCI) Image Format Specification
Azure storage features with Azure container registry
Encryption-at-rest: All container images in your registry are encrypted at rest. Azure automatically encrypts an image before storing it, and decrypts it on-the-fly when you or your applications and services pull the image.
Regional storage: Azure Container Registry stores data in the region where the registry is created, to help customers meet data residency and compliance requirements. If a regional outage occurs, the registry data may become unavailable and is not automatically recovered. Enable geo-replication to avoid this outage.
Zone redundancy: A feature of the Premium service tier, zone redundancy uses Azure availability zones to replicate your registry to a minimum of three separate zones in each enabled region.
Scalable storage: Azure Container Registry allows you to create as many repositories, images, layers, or tags as you need, up to the registry storage limit. However, you should periodically delete unused repositories, tags, and images as part of your registry maintenance routine to keep up the performance of your registry. Deleted registry resources like repositories, images, and tags cannot be recovered after deletion.
Azure Container Registry Tasks
- Use Azure Container Registry Tasks (ACR Tasks) to streamline building, testing, pushing, and deploying images in Azure.
Build and manage containers with tasks
ACR Tasks is a suite of features within Azure Container Registry. It provides cloud-based container image building for platforms including Linux, Windows, and ARM, and can automate OS and framework patching for your Docker containers. ACR Tasks enables automated builds triggered by source code updates, updates to a container's base image, or timers.
Task Scenarios
ACR Tasks supports several scenarios to build and maintain container images and other artifacts:
1. Quick task - Build and push a single container image to a container registry on-demand, in Azure, without needing a local Docker Engine installation.
Using the familiar docker build format, the az acr build command in the Azure CLI takes a context (the set of files to build), sends it to ACR Tasks and, by default, pushes the built image to its registry upon completion.
2. Automatically triggered tasks - Enable one or more triggers to build an image:
Trigger on source code update: For example, configure a build task with the Azure CLI command
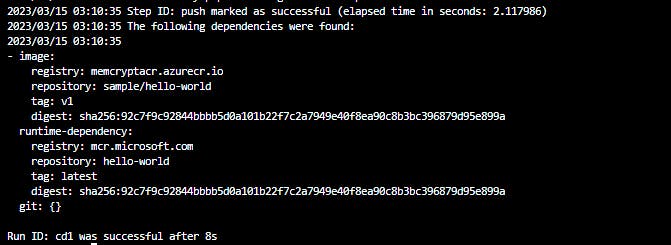
az acr task createby specifying a Git repository and optionally a branch and Dockerfile. When your team updates code in the repository, an ACR Tasks-created webhook triggers a build of the container image defined in the repo.Trigger on base image update: You can set up an ACR task to track a dependency on a base image when it builds an application image. When the updated base image is pushed to your registry, or a base image is updated in a public repo such as in Docker Hub, ACR Tasks can automatically build any application images based on it.
Trigger on a schedule: Scheduling a task is useful for running container workloads on a defined schedule, or running maintenance operations or tests on images pushed regularly to your registry.
3. Multi-step task - Extend the single image build-and-push capability of ACR Tasks with multi-step, multi-container-based workflows.
Multi-step tasks, defined in a YAML file specify individual build and push operations for container images or other artifacts. They can also define the execution of one or more containers, with each step using the container as its execution environment. For example, you can create a multi-step task that automates the following:
Build a web application image
Run the web application container
Build a web application test image
Run the web application test container, which performs tests against the running application container
If the tests pass, build a Helm chart archive package
Perform a
helm upgradeusing the new Helm chart archive package
Dockerfile
A Dockerfile is a text file that contains the instructions we use to build and run a Docker image.
Below are the elements of a Dockerfile:
The base or parent image to create the new image
Commands to update the base OS and install additional software
Build artifacts to include, such as a developed application
Services to expose, such as storage and network configuration
Command to run when the container is launched
Sample Dockerfile
# Step 1: Specify the parent image for the new image
FROM ubuntu:18.04

# Step 2: Update OS packages and install additional software
RUN apt -y update &&  apt install -y wget nginx software-properties-common apt-transport-https \
    && wget -q https://packages.microsoft.com/config/ubuntu/18.04/packages-microsoft-prod.deb -O packages-microsoft-prod.deb \
    && dpkg -i packages-microsoft-prod.deb \
    && add-apt-repository universe \
    && apt -y update \
    && apt install -y dotnet-sdk-3.0

#Step 3: Start Nginx environment
CMD service nginx start

#Step 4: Configure Nginx environment
COPY ./default /etc/nginx/sits-available/default

#Step 5: Configure work directory
WORKDIR /app

#Step 6: Copy website code to container
COPY ./website/. .

#Step 7: Configure network requirements
EXPOSE 80:8080

#Step 8: Define the entry point of the process that runs in the container
ENTRYPOINT ["dotnet", "website.dll"]
Notice that there are several commands in this file that allow us to manipulate the structure of the image. Each of these steps creates a cached container image as we build the final container image. These temporary images are layered on top of the previous and presented as single image once all steps complete.
Finally, notice the last step, step 8. The ENTRYPOINT in the file indicates which process will execute once we run a container from an image.
PRACTICAL 03: Build and run a container image by using Azure Container Registry Tasks
Pre-requisites:
- An Azure account with an active subscription.
Step 1: Login to Azure and start the Cloud Shell

Step 2: Create a resource group for the registry
az group create --name demo-rg --location "South Central US"
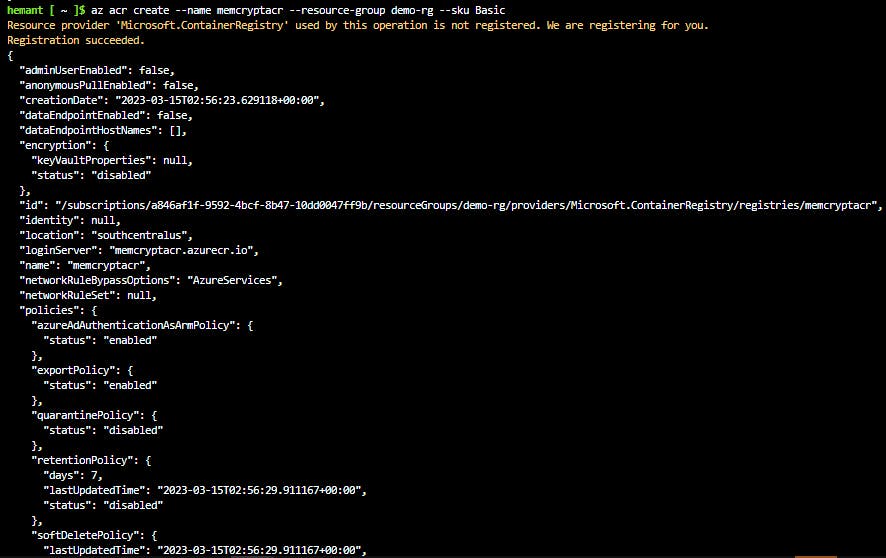
Step 3: Create a basic container registry
The registry name must be unique within Azure, and contains 5-50 alphanumeric characters.
az acr create --resource-group demo-rg --name myContainerRegistry --sku Basic
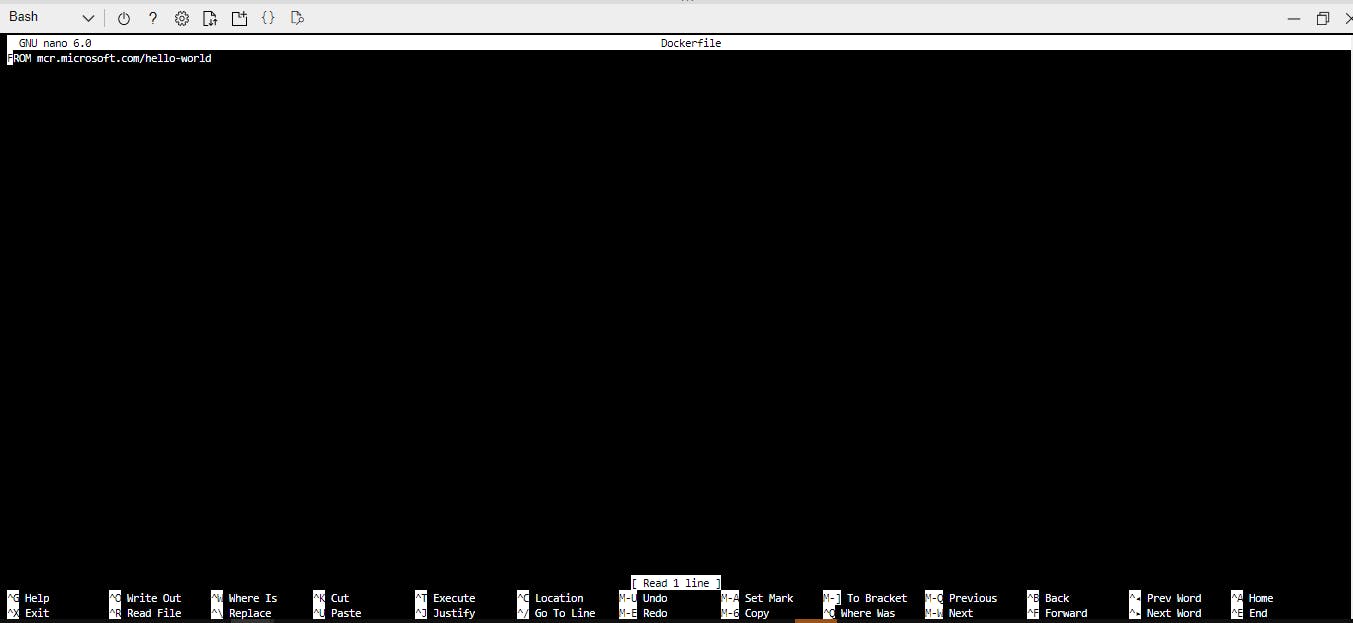
Step 4: Create a Dockerfile
The Dockerfile will contain a single line that references the hello-world image hosted at the Microsoft Container Registry.
echo FROM mcr.microsoft.com/hello-world > Dockerfile
We can see the contents of the Dockerfile, it's just a single line.

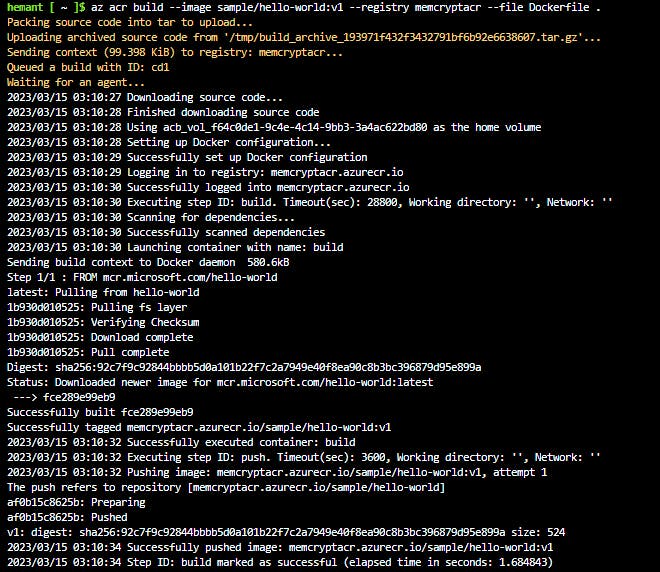
Step 5: Build the image and push to your registry
Below is the command used to build and push your image to the registry.
az acr build --image sample/hello-world:v1 \
   --registry myContainerRegistry \
   --file Dockerfile .
--image specifies the name of your new image in the format repo/image:tag--registry contains the registry where this image needs to be pushed--file is the name of the Dockerfile you want to use. is source location i.e. the local source code directory path
Step 6: Verify the list of repositories in your registry
az acr repository list --name myContainerRegistry -o table

Step 7: Verify the list of tags in your registry
az acr repository show-tags --name myContainerRegistry --repository sample/hello-world -o table

Step 8: Run the image in ACR
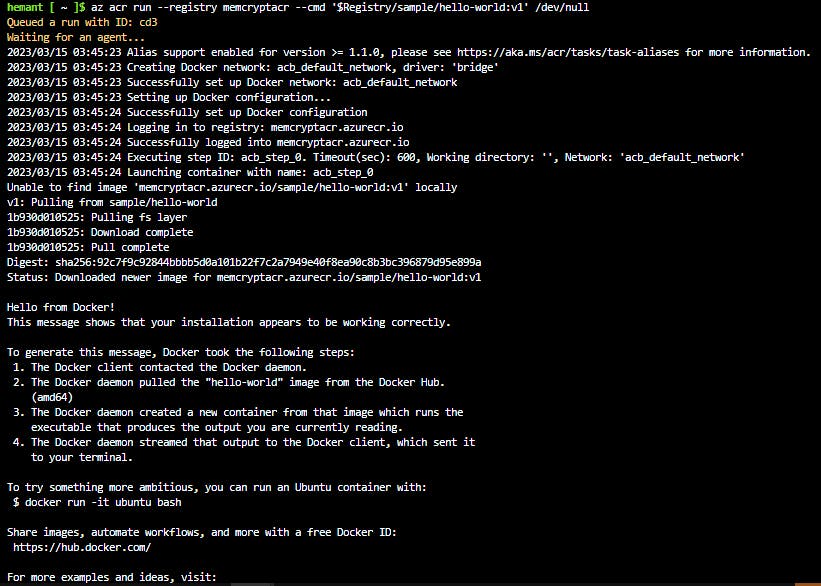
Run the sample/hello-world:v1 container image from your container registry by using the below command. The cmd parameter in this example runs the container in its default configuration, but cmd supports additional docker run parameters or even other docker commands. It uses $Registry to specify the registry where you run the command.
az acr run --registry myContainerRegistry \
    --cmd '$Registry/sample/hello-world:v1' /dev/null
--registry contains our registry name--cmd is the command to execute/dev/null is source location i.e. the local source code directory path. If '/dev/null' is specified, the value will be set to None and ignored.

Step 9: Clean up resources
When no longer needed, you can use the below command to remove the resource group, the container registry, and the container images stored there.
az group delete --name demo-rg
Azure Container Instances (ACI)
Azure Container Instances (ACI) offers the fastest and simplest way to run a container in Azure, without having to manage any virtual machines and without having to adopt a higher-level service.
Azure Container Instances (ACI) is a great solution for any scenario that can operate in isolated containers, including simple applications, task automation, and build jobs.
Features
Fast startup times: Containers can start in seconds without the need to provision and manage VMs.
Public IP connectivity and DNS name: Containers can be directly exposed to the internet with an IP address and a fully qualified domain name (FQDN)
Hypervisor-level security: Container applications are as isolated in a container as they would be in a VM.
Customer data: ACI service stores the minimum customer data required to ensure your container groups are running as expected.
Custom sizes: ACI provides optimum utilization by allowing exact specifications of CPU cores and memory. Container nodes can be scaled dynamically to match actual resource demands for an application
Persistent storage: Containers support direct mounting of Azure Files shares
Linux and Windows containers: The same API is used to schedule both Linux and Windows containers
Co-scheduled groups: Container Instances supports scheduling of multicontainer groups that share host machine resources
Virtual network deployment: Container Instances can be deployed into an Azure virtual network.
Container Groups
The top-level resource in Azure Container Instances is the container group. A container group is a collection of containers that get scheduled on the same host machine. The containers in a container group share a lifecycle, resources, local network, and storage volumes.
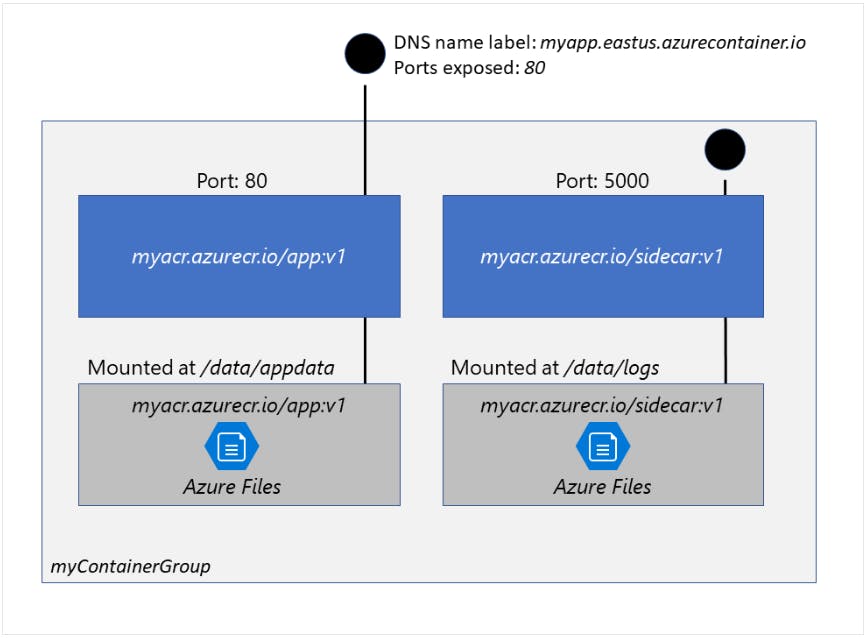
The above example container group:
Is scheduled on a single host machine.
Is assigned a DNS name label.
Exposes a single public IP address, with one exposed port.
Consists of two containers. One container listens on port 80, while the other listens on port 5000.
Includes two Azure file shares as volume mounts, and each container mounts one of the shares locally.
Multi-container groups are useful in cases where you want to divide a single functional task into a small number of container images.
Deployment
There are two common ways to deploy a multi-container group: ARM template or a YAML file.
An Azure Resource Manager (ARM) template is recommended when you need to deploy additional Azure service resources (for example, an Azure Files share) when you deploy the container instances.
Due to the YAML format's more concise nature, a YAML file is recommended when your deployment includes only container instances.
Resource allocation
Azure Container Instances allocates resources such as CPUs, memory, and optionally GPUs to a container group by adding the resource requests of the instances in the group.
For example, if you create a container group with two instances, each requesting 1 CPU, then the container group is allocated 2 CPUs.
Networking
Container groups share an IP address and a port namespace on that IP address. Because containers within the group share a port namespace, port mapping isn't supported. Containers within a group can reach each other via localhost on the ports that they have exposed, even if those ports aren't exposed externally on the group's IP address.
Storage
Specify external volumes to mount within a container group. Then map those volumes into specific paths within the individual containers in a group. Supported volumes include:
Azure file share
Secret
Empty directory
Cloned git repo
Common scenarios
Multi-container groups are useful in cases where you want to divide a single functional task into a small number of container images. These images can then be delivered by different teams and have separate resource requirements.
Example usage could include:
A container serving a web application and a container pulling the latest content from source control.
An application container and a logging container. The logging container collects the logs and metrics output by the main application and writes them to long-term storage.
An application container and a monitoring container. The monitoring container periodically makes a request to the application to ensure that it's running and responding correctly, and raises an alert if it's not.
A front-end container and a back-end container. The front end might serve a web application, with the back end running a service to retrieve data.
PRACTICAL 04: Deploy a container instance by using the Azure CLI
Pre-requisites:
- An Azure account with an active subscription.
Step 1: Login to Azure and start the Cloud Shell
Step 2: Create a resource group for the container
az group create --name demo-rg --location "South Central US"
Step 3: Create a DNS name to expose your container to the Internet
Run below command from Cloud Shell to create a variable that holds a unique DNS name
DNS_NAME_LABEL=my-container-$RANDOM

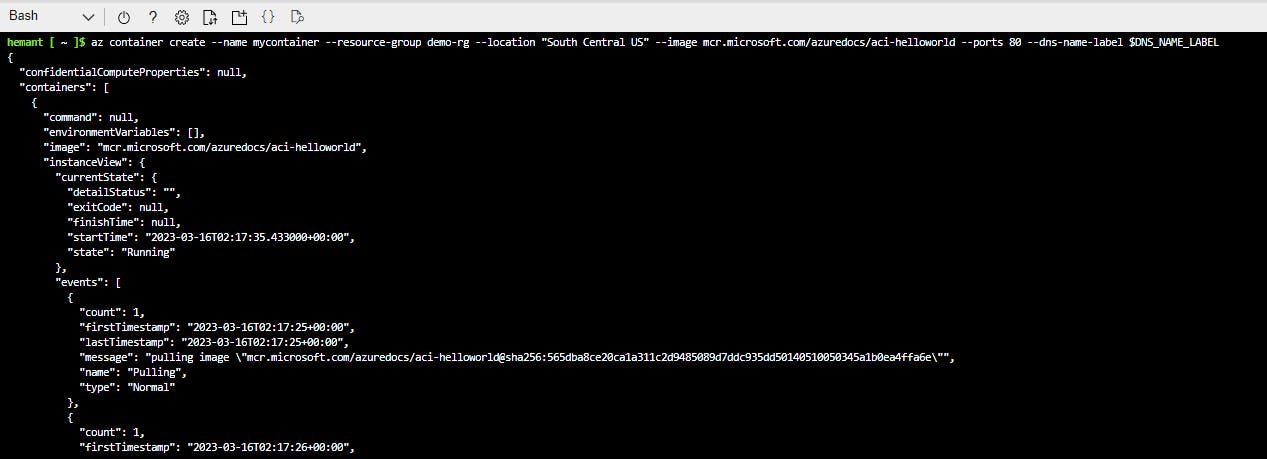
Step 4: Create a container instance
az container create --resource-group demo-rg \
    --name mycontainer \
    --image mcr.microsoft.com/azuredocs/aci-helloworld \
    --ports 80 \
    --dns-name-label $DNS_NAME_LABEL --location "South Central US"
Step 5: Check container status
az container show --resource-group az204-aci-rg \
    --name mycontainer \
    --query "{FQDN:ipAddress.fqdn,ProvisioningState:provisioningState}" \
    --out table
You see your container's fully qualified domain name (FQDN) and its provisioning state.

From a browser, navigate to your container's FQDN to see it running.

Step 6: Clean up resources
When no longer needed, you can use the below command to remove the resource group, the container registry, and the container images stored there.
az group delete --name demo-rg
Run containerized tasks with restart policies
When you create a container group in Azure Container Instances, you can specify one of three restart policy settings.
| Restart policy | Description |
Always | Containers in the container group are always restarted. This is the default setting applied when no restart policy is specified at container creation. |
Never | Containers in the container group are never restarted. The containers run at most once. |
OnFailure | Containers in the container group are restarted only when the process executed in the container fails (when it terminates with a nonzero exit code). The containers are run at least once. |
az container create \
    --resource-group myResourceGroup \
    --name mycontainer \
    --image mycontainerimage \
    --restart-policy OnFailure
With a configurable restart policy, you can specify that your containers are stopped when their processes have completed. When Azure Container Instances stops a container whose restart policy is Never or OnFailure, the container's status is set to Terminated.
Set environment variables in container instances
Setting environment variables in your container instances allows you to provide dynamic configuration of the application or script run by the container.
az container create \
    --resource-group myResourceGroup \
    --name mycontainer2 \
    --image mcr.microsoft.com/azuredocs/aci-wordcount:latest
    --restart-policy OnFailure \
    --environment-variables 'NumWords'='5' 'MinLength'='8'\
Secure Values
If you need to pass secrets as environment variables, Azure Container Instances supports secure values for both Windows and Linux containers. Set a secure environment variable by specifying the secureValue property instead of the regular value for the variable's type. The two variables defined in the following YAML demonstrate the two variable types.
apiVersion: 2018-10-01
location: eastus
name: securetest
properties:
  containers:
  - name: mycontainer
    properties:
      environmentVariables:
        - name: 'NOTSECRET'
          value: 'my-exposed-value'
        - name: 'SECRET'
          secureValue: 'my-secret-value'
      image: nginx
      ports: []
      resources:
        requests:
          cpu: 1.0
          memoryInGB: 1.5
  osType: Linux
  restartPolicy: Always
tags: null
type: Microsoft.ContainerInstance/containerGroups
You would run the following command to deploy the container group with YAML:
az container create --resource-group myResourceGroup \
    --file secure-env.yaml \
Environment variables with secure values aren't visible in your container's properties. Their values can be accessed only from within the container. For example, container properties viewed in the Azure portal or Azure CLI display only a secure variable's name, not its value.
Mount an Azure file share in Azure Container Instances
By default, Azure Container Instances are stateless. If the container crashes or stops, all of its state is lost. To persist state beyond the lifetime of the container, you must mount a volume from an external store. Azure Container Instances can mount an Azure file share created with Azure Files.
Limitations
You can only mount Azure Files shares to Linux containers.
Azure file share volume mount requires the Linux container run as root.
Azure File share volume mounts are limited to CIFS support.
Deploy container and mount volume
To mount an Azure file share as a volume in a container by using the Azure CLI, specify the share and volume mount point when you create the container. Below is an example of the command:
az container create \
    --resource-group $ACI_PERS_RESOURCE_GROUP \
    --name hellofiles \
    --image mcr.microsoft.com/azuredocs/aci-hellofiles \
    --dns-name-label aci-demo \
    --ports 80 \
    --azure-file-volume-account-name $ACI_PERS_STORAGE_ACCOUNT_NAME \
    --azure-file-volume-account-key $STORAGE_KEY \
    --azure-file-volume-share-name $ACI_PERS_SHARE_NAME \
    --azure-file-volume-mount-path /aci/logs/
Deploy container and mount volume - YAML
You can also deploy a container group and mount a volume in a container with the Azure CLI and a YAML template. Deploying by YAML template is the preferred method when deploying container groups consisting of multiple containers.
The following YAML template defines a container group with one container created with the aci-hellofiles image. The container mounts the Azure file share acishare created previously as a volume. An example YAML file is shown below.
apiVersion: '2019-12-01'
location: eastus
name: file-share-demo
properties:
  containers:
  - name: hellofiles
    properties:
      environmentVariables: []
      image: mcr.microsoft.com/azuredocs/aci-hellofiles
      ports:
      - port: 80
      resources:
        requests:
          cpu: 1.0
          memoryInGB: 1.5
      volumeMounts:
      - mountPath: /aci/logs/
        name: filesharevolume
  osType: Linux
  restartPolicy: Always
  ipAddress:
    type: Public
    ports:
      - port: 80
    dnsNameLabel: aci-demo
  volumes:
  - name: filesharevolume
    azureFile:
      sharename: acishare
      storageAccountName: <Storage account name>
      storageAccountKey: <Storage account key>
tags: {}
type: Microsoft.ContainerInstance/containerGroups
Mount multiple volumes
To mount multiple volumes in a container instance, you must deploy using an Azure Resource Manager template or a YAML file. To use a template or YAML file, provide the share details and define the volumes by populating the volumes array in the properties section of the template.
For example, if you created two Azure Files shares named share1 and share2 in storage account myStorageAccount, the volumes array in a Resource Manager template would appear similar to the following:
"volumes": [{
  "name": "myvolume1",
  "azureFile": {
    "shareName": "share1",
    "storageAccountName": "myStorageAccount",
    "storageAccountKey": "<storage-account-key>"
  }
},
{
  "name": "myvolume2",
  "azureFile": {
    "shareName": "share2",
    "storageAccountName": "myStorageAccount",
    "storageAccountKey": "<storage-account-key>"
  }
}]
Next, for each container in the container group in which you'd like to mount the volumes, populate the volumeMounts array in the properties section of the container definition. For example, this mounts the two volumes, myvolume1 and myvolume2, previously defined:
"volumeMounts": [{
  "name": "myvolume1",
  "mountPath": "/mnt/share1/"
},
{
  "name": "myvolume2",
  "mountPath": "/mnt/share2/"
}]
Container Troubleshooting
- To troubleshoot a container you can pull logs with
az container logs
az container logs \
   --resource-group my-rg \
   --name my-app
- To get diagnostic information during container startup use the
az container attach
az container attach \
  --resource-group my-rg
  --name my-app
- To start an interactive container, run
az container exec. The below command will open shell terminal into the container.
az container exec \
  --resource-group my-rg \
  --name my-app \
  --exec-command /bin/sh
- To get metrics such as CPU usage, use
az monitor metrics list
az monitor metrics list \
  --resource $CONTAINER_ID \
  --metric CPUUsage \
  --output table
Up Next - Azure app service - Developing Solutions for Microsoft Azure - Part 1.2