

Photo by Vishnu Mohanan on Unsplash
Azure Blob storage - Developing Solutions for Microsoft Azure - Part 2.2


Table of contents
- 2. Develop for Azure Storage
- 2.2 Develop solutions that use Azure Blob Storage
- Rehydrate blob data from the archive tier
All the notes on this page have been taken from Microsoft's learning portal - learn.microsoft.com. If any of this material is copyrighted, please let me know in the comments below and I will remove it. The main goal here is to learn and understand the concepts for developing solutions for Microsoft Azure. These notes may be helpful to prepare for the certification AZ-204: Developing Solutions for Microsoft Azure
Continuing from Azure Cosmos DB - Developing Solutions for Microsoft Azure - Part 2.1
2. Develop for Azure Storage
2.2 Develop solutions that use Azure Blob Storage
Azure Blob storage
Azure Blob storage is Microsoft's object storage solution for the cloud. Blob storage is optimized for storing massive amounts of unstructured data.
Blob storage is designed for:
Serving images or documents directly to a browser.
Storing files for distributed access.
Streaming video and audio.
Writing to log files.
Storing data for backup and restore, disaster recovery, and archiving.
Storing data for analysis by an on-premises or Azure-hosted service.
Users or client applications can access objects in Blob storage via HTTP/HTTPS, from anywhere in the world. Objects in Blob storage are accessible via the Azure Storage REST API, Azure PowerShell, Azure CLI, or an Azure Storage client library.
An Azure Storage account is the top-level container for all of your Azure Blob storage. The storage account provides a unique namespace for your Azure Storage data that is accessible from anywhere in the world over HTTP or HTTPS.
Types of storage accounts
Azure Storage offers two performance levels of storage accounts, standard and premium. Each performance level supports different features and has its own pricing model.
Standard: This is the standard general-purpose v2 account and is recommended for most scenarios using Azure Storage.
Premium: Premium accounts offer higher performance by using solid-state drives. If you create a premium account you can choose between three account types, block blobs, page blobs, or file shares.
The following table describes the types of storage accounts recommended by Microsoft for most scenarios using Blob storage.
| Storage account type | Supported storage services | Usage |
| Standard general-purpose v2 | Blob, Queue, and Table storage, Azure Files | Standard storage account type for blobs, file shares, queues, and tables. Recommended for most scenarios using Azure Storage. If you want support for NFS file shares in Azure Files, use the premium file shares account type. |
| Premium block blobs | Blob storage | Premium storage account type for block blobs and append blobs. Recommended for scenarios with high transactions rates, or scenarios that use smaller objects or require consistently low storage latency. |
| Premium page blobs | Page blobs only | Premium storage account type for page blobs only. |
| Premium file shares | Azure Files | Premium storage account type for file shares only. |
Access tiers for block blob data
Azure Storage provides different options for accessing block blob data based on usage patterns. The available access tiers are:
The Hot access tier, which is optimized for frequent access of objects in the storage account. The Hot tier has the highest storage costs, but the lowest access costs. New storage accounts are created in the hot tier by default.
The Cool access tier, which is optimized for storing large amounts of data that is infrequently accessed and stored for at least 30 days. The Cool tier has lower storage costs and higher access costs compared to the Hot tier.
The Archive tier, which is available only for individual block blobs. The archive tier is optimized for data that can tolerate several hours of retrieval latency and will remain in the Archive tier for at least 180 days. The archive tier is the most cost-effective option for storing data, but accessing that data is more expensive than accessing data in the hot or cool tiers.
Azure Blob storage resource types
Blob storage offers three types of resources:
The storage account.
A container in the storage account
A blob in a container
Storage accounts
A storage account provides a unique namespace in Azure for your data. Every object that you store in Azure Storage has an address that includes your unique account name. The combination of the account name and the Azure Storage blob endpoint forms the base address for the objects in your storage account.
For example, if your storage account is named mystorageaccount, then the default endpoint for Blob storage ishttp://mystorageaccount.blob.core.windows.net
Containers
A container organizes a set of blobs, similar to a directory in a file system. A storage account can include an unlimited number of containers, and a container can store an unlimited number of blobs. The container name must be lowercase.
Blobs
Azure Storage supports three types of blobs:
Block blobs store text and binary data, up to about 190.7 TB. Block blobs are made up of blocks of data that can be managed individually.
Append blobs are made up of blocks like block blobs, but are optimized for append operations. Append blobs are ideal for scenarios such as logging data from virtual machines.
Page blobs store random access files up to 8 TB in size. Page blobs store virtual hard drive (VHD) files and serve as disks for Azure virtual machines.
Azure Storage security features
Azure Storage provides a comprehensive set of security capabilities :
All data (including metadata) written to Azure Storage is automatically encrypted using Storage Service Encryption (SSE).
Azure Active Directory (Azure AD) and Role-Based Access Control (RBAC) are supported for Azure Storage for both resource management operations and data operations, as follows:
You can assign RBAC roles (scoped to the storage account) to security principals and use Azure AD to authorize resource management operations such as key management.
Azure AD integration is supported for blob and queue data operations. You can assign RBAC roles (scoped to a subscription, resource group, storage account, or an individual container or queue) to a security principal or a managed identity for Azure resources.
Data can be secured in transit between an application and Azure by using Client-Side Encryption, HTTPS, or SMB 3.0.
OS and data disks used by Azure virtual machines can be encrypted using Azure Disk Encryption.
Delegated access to the data objects in Azure Storage can be granted using a shared access signature.
Azure Storage encryption for data at rest
Azure Storage automatically encrypts your data when persisting it to the cloud. Data in Azure Storage is encrypted and decrypted transparently using 256-bit AES encryption.
Azure Storage encryption is enabled for all new and existing storage accounts and cannot be disabled. Because your data is secured by default, you don't need to modify your code or applications to take advantage of Azure Storage encryption.
Storage accounts are encrypted regardless of their performance tier (standard or premium) or deployment model (Azure Resource Manager or classic). All Azure Storage redundancy options support encryption, and all copies of a storage account are encrypted. All Azure Storage resources are encrypted, including blobs, disks, files, queues, and tables. All object metadata is also encrypted.
Encryption does not affect Azure Storage performance. There is no additional cost for Azure Storage encryption.
Encryption key management
You can rely on Microsoft-managed keys for the encryption of your storage account, or you can manage encryption with your own keys. If you choose to manage encryption with your own keys, you have two options:
You can specify a customer-managed key to use for encrypting and decrypting all data in the storage account. A customer-managed key is used to encrypt all data in all services in your storage account.
You can specify a customer-provided key on Blob storage operations. A client making a read or write request against Blob storage can include an encryption key on the request for granular control over how blob data is encrypted and decrypted.
The following table compares key management options for Azure Storage encryption.
| Microsoft-managed keys | Customer-managed keys | Customer-provided keys | |
| Encryption/decryption operations | Azure | Azure | Azure |
| Azure Storage services supported | All | Blob storage, Azure Files | Blob storage |
| Key storage | Microsoft key store | Azure Key Vault | Azure Key Vault or any other key store |
| Key rotation responsibility | Microsoft | Customer | Customer |
| Key usage | Microsoft | Azure portal, Storage Resource Provider REST API, Azure Storage management libraries, PowerShell, CLI | Azure Storage REST API (Blob storage), Azure Storage client libraries |
| Key access | Microsoft only | Microsoft, Customer | Customer only |
Azure Storage redundancy options
Azure Storage always stores multiple copies of your data so that it is protected from planned and unplanned events, including transient hardware failures, network or power outages, and massive natural disasters. Redundancy ensures that your storage account meets its availability and durability targets even in the face of failures.
When deciding which redundancy option is best for your scenario, consider the tradeoffs between lower costs and higher availability. The factors that help determine which redundancy option you should choose include:
How your data is replicated in the primary region
Whether your data is replicated to a second region that is geographically distant to the primary region, to protect against regional disasters
Whether your application requires read access to the replicated data in the secondary region if the primary region becomes unavailable for any reason
Redundancy in the primary region
Data in an Azure Storage account is always replicated three times in the primary region. Azure Storage offers two options for how your data is replicated in the primary region.
Locally redundant storage (LRS): Copies your data synchronously three times within a single physical location in the primary region. LRS is the least expensive replication option, but is not recommended for applications requiring high availability or durability.
Zone-redundant storage (ZRS): Copies your data synchronously across three Azure availability zones in the primary region. For applications requiring high availability, Microsoft recommends using ZRS in the primary region, and also replicating to a secondary region.
Redundancy in a secondary region
For applications requiring high durability, you can choose to additionally copy the data in your storage account to a secondary region that is hundreds of miles away from the primary region. If your storage account is copied to a secondary region, then your data is durable even in the case of a complete regional outage or a disaster in which the primary region isn't recoverable.
When you create a storage account, you select the primary region for the account. The paired secondary region is determined based on the primary region, and can't be changed.
Azure Storage offers two options for copying your data to a secondary region:
Geo-redundant storage (GRS) copies your data synchronously three times within a single physical location in the primary region using LRS. It then copies your data asynchronously to a single physical location in the secondary region. Within the secondary region, your data is copied synchronously three times using LRS.
Geo-zone-redundant storage (GZRS) copies your data synchronously across three Azure availability zones in the primary region using ZRS. It then copies your data asynchronously to a single physical location in the secondary region. Within the secondary region, your data is copied synchronously three times using LRS.
Practical 09: Create a block blob storage account
The block blob storage account type lets you create block blobs with premium performance characteristics. This type of storage account is optimized for workloads with high transactions rates or that requires very fast access times.
Prerequisites
An Azure account with an active subscription.
Step 1: Create account in the Azure portal
To create a block blob storage account in the Azure portal, follow these steps:
In the Azure portal, select All services > the Storage category > Storage accounts.
Under Storage accounts, select + Create.
In the Subscription field, select the subscription in which to create the storage account.
In the Resource group field, select Create new and enter az204-blob-rg as the name for the new resource group.
In the Storage account name field, enter a name for the account. Note the following guidelines:
The name must be unique across Azure.
The name must be between 3 and 24 characters long.
The name can include only numbers and lowercase letters.
In the Location field, select a location for the storage account, or use the default location.
For the rest of the settings, configure the following:
| Field | Value | | --- | --- | | Performance | Select Premium. | | Premium account type | Select Block blobs. | | Replication | Leave the default setting of Locally-redundant storage (LRS). |
Select Review + create to review the storage account settings.
Select Create.
Step 2: Create account by using Azure Cloud Shell
Login to the Azure portal and open the Cloud Shell.
- You can also login to the Azure Cloud Shell directly.
Create a new resource group. Replace
<myLocation>with a region near you.Note: Skip this step if you created a resource group in the Create account in the Azure portal section above.
az group create --name az204-blob-rg --location <myLocation>Create the block blob storage account. See Step 5 in the Create account in the Azure portal instructions above for the storage account name requirements. Replace
<myLocation>with a region near you.az storage account create --resource-group az204-blob-rg --name \ <myStorageAcct> --location <myLocation> \ --kind BlockBlobStorage --sku Premium_LRS
Step 3: Clean up resources
When you no longer need the resources in this walkthrough use the following command to delete the resource group and associated resources.
az group delete --name az204-blob-rg --no-wait
Azure Blob storage lifecycle
Data sets have unique lifecycles. Early in the lifecycle, people access some data often. But the need for access drops drastically as the data ages. Some data stays idle in the cloud and is rarely accessed once stored. Some data expires days or months after creation, while other data sets are actively read and modified throughout their lifetimes.
Access tiers
Azure storage offers different access tiers, allowing you to store blob object data in the most cost-effective manner. Available access tiers include:
Hot - Optimized for storing data that is accessed frequently.
Cool - Optimized for storing data that is infrequently accessed and stored for at least 30 days.
Archive - Optimized for storing data that is rarely accessed and stored for at least 180 days with flexible latency requirements, on the order of hours.
The following considerations apply to the different access tiers:
The access tier can be set on a blob during or after upload.
Only the hot and cool access tiers can be set at the account level. The archive access tier can only be set at the blob level.
Data in the cool access tier has slightly lower availability, but still has high durability, retrieval latency, and throughput characteristics similar to hot data.
Data in the archive access tier is stored offline. The archive tier offers the lowest storage costs but also the highest access costs and latency.
The hot and cool tiers support all redundancy options. The archive tier supports only LRS, GRS, and RA-GRS.
Data storage limits are set at the account level and not per access tier. You can choose to use all of your limit in one tier or across all three tiers.
Manage the data lifecycle
Azure Blob storage lifecycle management offers a rich, rule-based policy for General Purpose v2 and Blob storage accounts. Use the policy to transition your data to the appropriate access tiers or expire at the end of the data's lifecycle. The lifecycle management policy lets you:
Transition blobs to a cooler storage tier (hot to cool, hot to archive, or cool to archive) to optimize for performance and cost
Delete blobs at the end of their lifecycles
Define rules to be run once per day at the storage account level
Apply rules to containers or a subset of blobs (using prefixes as filters)
Consider a scenario where data gets frequent access during the early stages of the lifecycle, but only occasionally after two weeks. Beyond the first month, the data set is rarely accessed. In this scenario, hot storage is best during the early stages. Cool storage is most appropriate for occasional access. Archive storage is the best tier option after the data ages over a month. By adjusting storage tiers in respect to the age of data, you can design the least expensive storage options for your needs. To achieve this transition, lifecycle management policy rules are available to move aging data to cooler tiers.
Note: Data stored in a premium block blob storage account cannot be tiered to Hot, Cool, or Archive using Set Blob Tier or using Azure Blob Storage lifecycle management. To move data, you must synchronously copy blobs from the block blob storage account to the Hot tier in a different account using the Put Block From URL API or a version of AzCopy that supports this API. The Put Block From URL API synchronously copies data on the server, meaning the call completes only once all the data is moved from the original server location to the destination location.
Blob storage lifecycle policies
A lifecycle management policy is a collection of rules in a JSON document. Each rule definition within a policy includes a filter set and an action set. The filter set limits rule actions to a certain set of objects within a container or objects names. The action set applies the tier or delete actions to the filtered set of objects.:
{
  "rules": [
    {
      "name": "rule1",
      "enabled": true,
      "type": "Lifecycle",
      "definition": {...}
    },
    {
      "name": "rule2",
      "type": "Lifecycle",
      "definition": {...}
    }
  ]
}
A policy is a collection of rules:
| Parameter name | Parameter type | Notes |
rules | An array of rule objects | At least one rule is required in a policy. You can define up to 100 rules in a policy. |
Each rule within the policy has several parameters:
| Parameter name | Parameter type | Notes | Required |
name | String | A rule name can include up to 256 alphanumeric characters. Rule name is case-sensitive. It must be unique within a policy. | True |
enabled | Boolean | An optional boolean to allow a rule to be temporarily disabled. Default value is true if it's not set. | False |
type | An enum value | The current valid type is Lifecycle. | True |
definition | An object that defines the lifecycle rule | Each definition is made up of a filter set and an action set. | True |
Rules
Each rule definition includes a filter set and an action set. The filter set limits rule actions to a certain set of objects within a container or objects names. The action set applies the tier or delete actions to the filtered set of objects.
The following sample rule filters the account to run the actions on objects that exist inside container1 and start with foo.
Tier blob to cool tier 30 days after last modification
Tier blob to archive tier 90 days after last modification
Delete blob 2,555 days (seven years) after last modification
Delete blob snapshots 90 days after snapshot creation
{
  "rules": [
    {
      "name": "ruleFoo",
      "enabled": true,
      "type": "Lifecycle",
      "definition": {
        "filters": {
          "blobTypes": [ "blockBlob" ],
          "prefixMatch": [ "container1/foo" ]
        },
        "actions": {
          "baseBlob": {
            "tierToCool": { "daysAfterModificationGreaterThan": 30 },
            "tierToArchive": { "daysAfterModificationGreaterThan": 90 },
            "delete": { "daysAfterModificationGreaterThan": 2555 }
          },
          "snapshot": {
            "delete": { "daysAfterCreationGreaterThan": 90 }
          }
        }
      }
    }
  ]
}
Rule filters
Filters limit rule actions to a subset of blobs within the storage account. If more than one filter is defined, a logical AND runs on all filters. Filters include:
| Filter name | Filter type | Is Required |
| blobTypes | An array of predefined enum values. | Yes |
| prefixMatch | An array of strings for prefixes to be match. Each rule can define up to 10 prefixes. A prefix string must start with a container name. | No |
| blobIndexMatch | An array of dictionary values consisting of blob index tag key and value conditions to be matched. Each rule can define up to 10 blob index tag condition. | No |
Rule actions
Actions are applied to the filtered blobs when the run condition is met.
Lifecycle management supports tiering and deletion of blobs and deletion of blob snapshots. Define at least one action for each rule on blobs or blob snapshots.
| Action | Base Blob | Snapshot | Version |
| tierToCool | Supported for blockBlob | Supported | Supported |
| enableAutoTierToHotFromCool | Supported for blockBlob | Not supported | Not supported |
| tierToArchive | Supported for blockBlob | Supported | Supported |
| delete | Supported for blockBlob and appendBlob | Supported | Supported |
Note: If you define more than one action on the same blob, lifecycle management applies the least expensive action to the blob. For example, action delete is cheaper than action tierToArchive. Action tierToArchive is cheaper than action tierToCool.
The run conditions are based on age. Base blobs use the last modified time to track age, and blob snapshots use the snapshot creation time to track age.
| Action run condition | Condition value | Description |
| daysAfterModificationGreaterThan | Integer value indicating the age in days | The condition for base blob actions |
| daysAfterCreationGreaterThan | Integer value indicating the age in days | The condition for blob snapshot actions |
| daysAfterLastAccessTimeGreaterThan | Integer value indicating the age in days | The condition for a current version of a blob when access tracking is enabled |
| daysAfterLastTierChangeGreaterThan | Integer value indicating the age in days after last blob tier change time | This condition applies only to tierToArchive actions and can be used only with the daysAfterModificationGreaterThan condition. |
Implement Blob storage lifecycle policies
You can add, edit, or remove a policy by using any of the following methods:
Azure portal
Azure PowerShell
Azure CLI
REST APIs
Below are the steps and some examples for the Portal and Azure CLI.
Azure portal
There are two ways to add a policy through the Azure portal: Azure portal List view, and Azure portal Code view.
Azure portal List view
Sign in to the Azure portal.
Select All resources and then select your storage account.
Under Data management, select Lifecycle management to view or change your rules.
Select the List view tab.
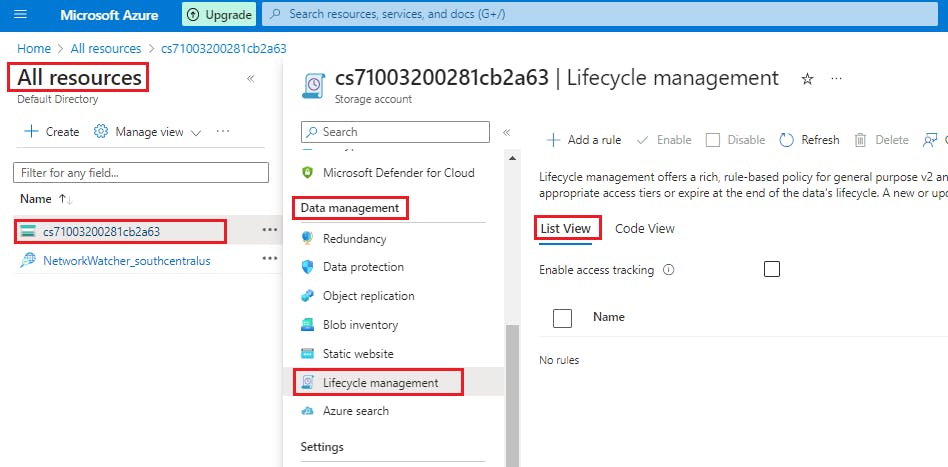
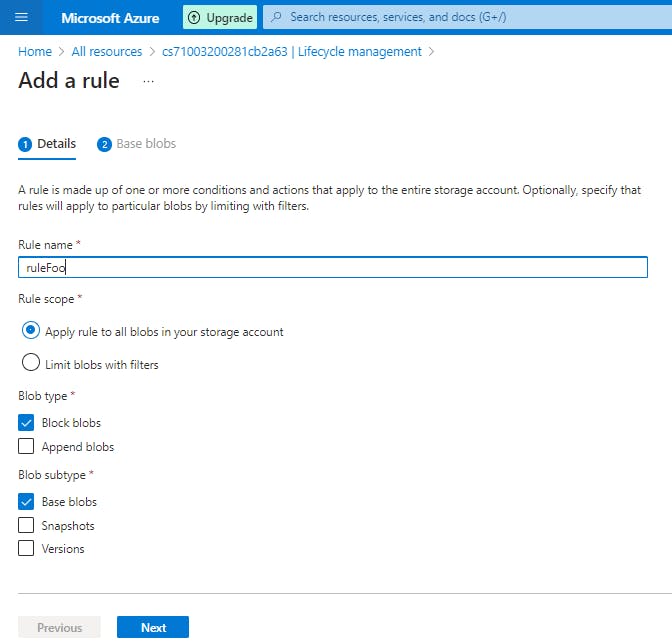
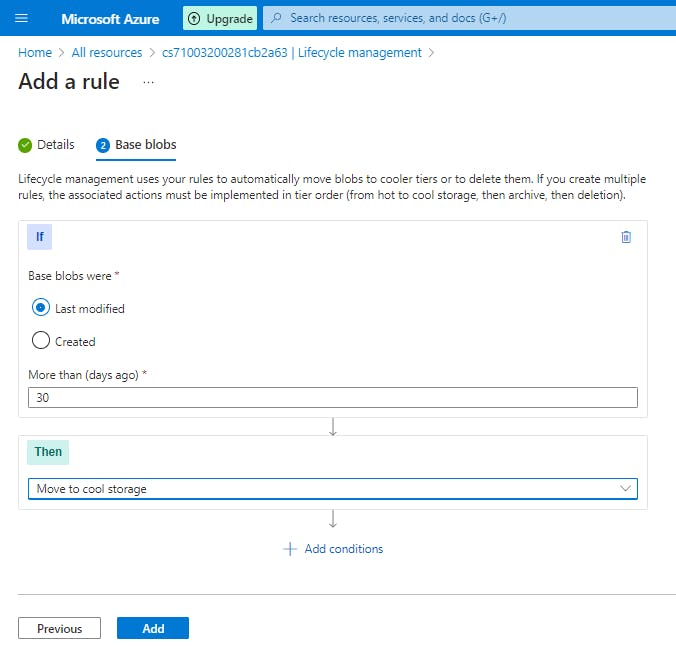
Select Add rule and then fill out the Action set form fields. In the following example, blobs are moved to cool storage if they haven't been modified for 30 days.
Select Filter set to add an optional filter. Then, select Browse to specify a container and folder by which to filter. (these options did not appear or me)
Select Review + add to review the policy settings. (this option did not appear or me)
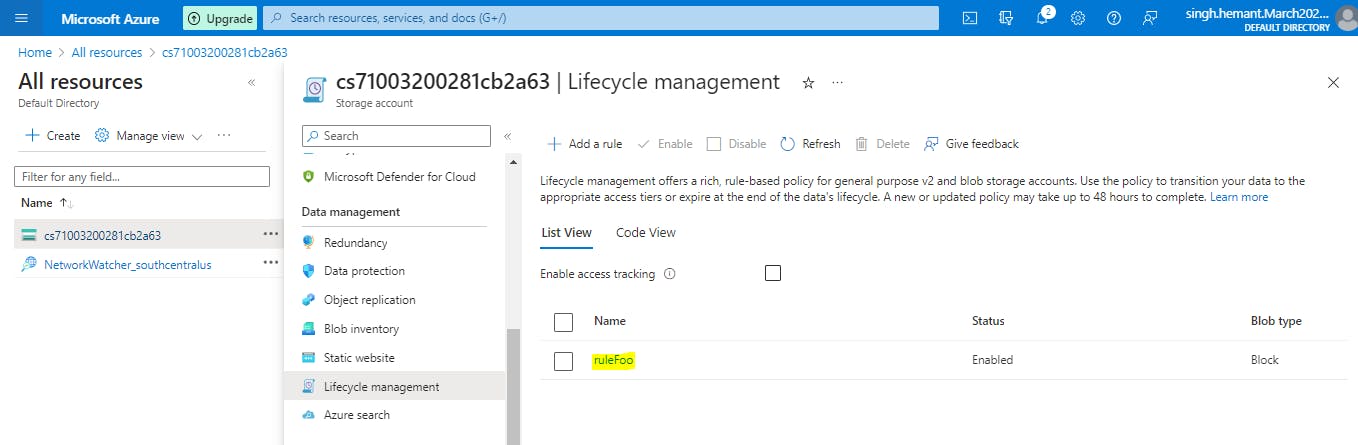
Select Add to add the new policy.
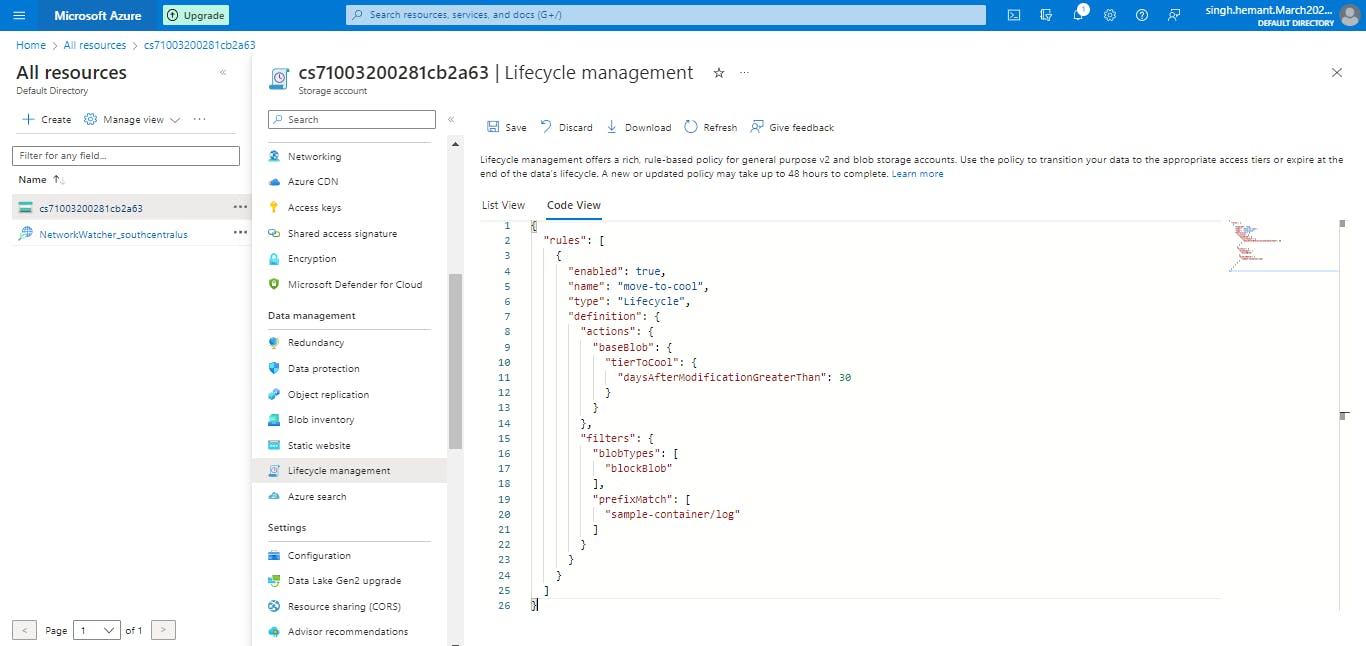
Azure portal Code view
Follow the first three steps above in the List view section.
Select the Code view tab. The following JSON is an example of a policy that moves a block blob whose name begins with log to the cool tier if it has been more than 30 days since the blob was modified.
JSONCopy
 {
   "rules": [
     {
       "enabled": true,
       "name": "move-to-cool",
       "type": "Lifecycle",
       "definition": {
         "actions": {
           "baseBlob": {
             "tierToCool": {
               "daysAfterModificationGreaterThan": 30
             }
           }
         },
         "filters": {
           "blobTypes": [
             "blockBlob"
           ],
           "prefixMatch": [
             "sample-container/log"
           ]
         }
       }
     }
   ]
 }
Select Save.
Azure CLI
To add a lifecycle management policy with Azure CLI, write the policy to a JSON file, then call the az storage account management-policy create command to create the policy.
az storage account management-policy create \
    --account-name <storage-account> \
    --policy @policy.json \
    --resource-group <resource-group>
A lifecycle management policy must be read or written in full. Partial updates are not supported.
Rehydrate blob data from the archive tier
Completed100 XP
- 3 minutes
While a blob is in the archive access tier, it's considered to be offline and can't be read or modified. In order to read or modify data in an archived blob, you must first rehydrate the blob to an online tier, either the hot or cool tier. There are two options for rehydrating a blob that is stored in the archive tier:
Copy an archived blob to an online tier: You can rehydrate an archived blob by copying it to a new blob in the hot or cool tier with the Copy Blob or Copy Blob from URL operation. Microsoft recommends this option for most scenarios.
Change a blob's access tier to an online tier: You can rehydrate an archived blob to hot or cool by changing its tier using the Set Blob Tier operation.
Rehydrating a blob from the archive tier can take several hours to complete. Microsoft recommends rehydrating larger blobs for optimal performance. Rehydrating several small blobs concurrently may require additional time.
Rehydration priority
When you rehydrate a blob, you can set the priority for the rehydration operation via the optional x-ms-rehydrate-priority header on a Set Blob Tier or Copy Blob/Copy Blob From URL operation. Rehydration priority options include:
Standard priority: The rehydration request will be processed in the order it was received and may take up to 15 hours.
High priority: The rehydration request will be prioritized over standard priority requests and may complete in under one hour for objects under 10 GB in size.
To check the rehydration priority while the rehydration operation is underway, call Get Blob Properties to return the value of the x-ms-rehydrate-priority header. The rehydration priority property returns either Standard or High.
Copy an archived blob to an online tier
You can use either the Copy Blob or Copy Blob from URL operation to copy the blob. When you copy an archived blob to a new blob in an online tier, the source blob remains unmodified in the archive tier. You must copy the archived blob to a new blob with a different name or to a different container. You cannot overwrite the source blob by copying to the same blob.
Copying an archived blob to an online destination tier is supported within the same storage account only. You cannot copy an archived blob to a destination blob that is also in the archive tier.
The following table shows the behavior of a blob copy operation, depending on the tiers of the source and destination blob.
| Hot tier source | Cool tier source | Archive tier source | |
| Hot tier destination | Supported | Supported | Supported within the same account. Requires blob rehydration. |
| Cool tier destination | Supported | Supported | Supported within the same account. Requires blob rehydration. |
| Archive tier destination | Supported | Supported | Unsupported |
Change a blob's access tier to an online tier
The second option for rehydrating a blob from the archive tier to an online tier is to change the blob's tier by calling Set Blob Tier. With this operation, you can change the tier of the archived blob to either hot or cool.
Once a Set Blob Tier request is initiated, it cannot be canceled. During the rehydration operation, the blob's access tier setting continues to show as archived until the rehydration process is complete.
To learn how to rehydrate a blob by changing its tier to an online tier, see Rehydrate a blob by changing its tier.
Caution: Changing a blob's tier doesn't affect its last modified time. If there is a lifecycle management policy in effect for the storage account, then rehydrating a blob with Set Blob Tier can result in a scenario where the lifecycle policy moves the blob back to the archive tier after rehydration because the last modified time is beyond the threshold set for the policy.
Azure Blob storage client library
The Azure Storage client libraries for .NET offer a convenient interface for making calls to Azure Storage.
Below are the primary classes used in Azure Blob storage client library:
Below are the classes in the Azure.Storage.Blobs namespace and their purpose:
| Class | Description |
BlobClient | The BlobClient allows you to manipulate Azure Storage blobs. |
BlobClientOptions | Provides the client configuration options for connecting to Azure Blob Storage. |
BlobContainerClient | The BlobContainerClient allows you to manipulate Azure Storage containers and their blobs. |
BlobServiceClient | The BlobServiceClient allows you to manipulate Azure Storage service resources and blob containers. The storage account provides the top-level namespace for the Blob service. |
BlobUriBuilder | The BlobUriBuilder class provides a convenient way to modify the contents of a Uri instance to point to different Azure Storage resources like an account, container, or blob. |
Practical 10: Create Blob storage resources by using the .NET client library
This exercise uses the Azure Blob storage client library to show you how to perform the following actions on Azure Blob storage in a console app:
Create a container
Upload blobs to a container
List the blobs in a container
Download blobs
Delete a container
Prerequisites
An Azure account with an active subscription.
Visual Studio Code on one of the supported platforms.
.NET 6 is the target framework for the steps below.
The C# extension for Visual Studio Code.
Step 1: Setting up
Perform the following actions to prepare Azure, and your local environment, for the exercise.
Start Visual Studio Code and open a terminal window by selecting Terminal from the top application bar, then selecting New Terminal.
Login to Azure by using the command below. A browser window should open letting you choose which account to login with.
az loginCreate a resource group for the resources needed for this exercise. Replace
<myLocation>with a region near you.az group create --location <myLocation> --name my-blob-rg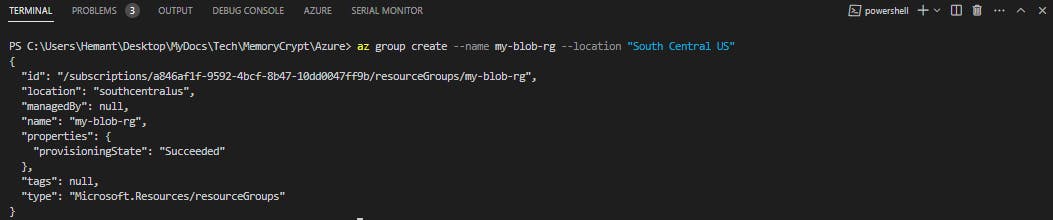
Create a storage account. We need a storage account created to use in the application. Replace
<myLocation>with the same region you used for the resource group. Replace<myStorageAcct>with a unique name.az storage account create --resource-group my-blob-rg --name <myStorageAcct> --location <myLocation> --sku Standard_LRS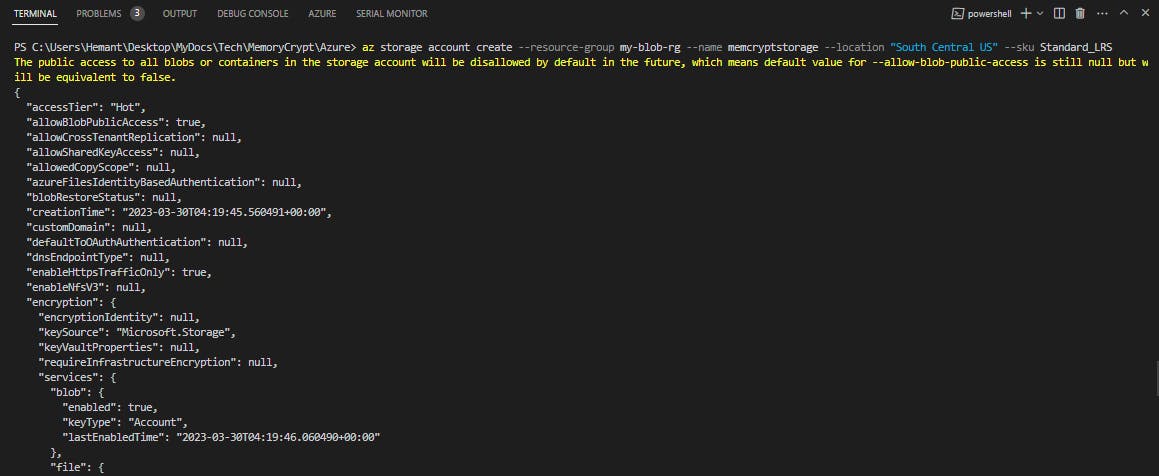
Get credentials for the storage account.
Navigate to the Azure portal.
Locate the storage account created.
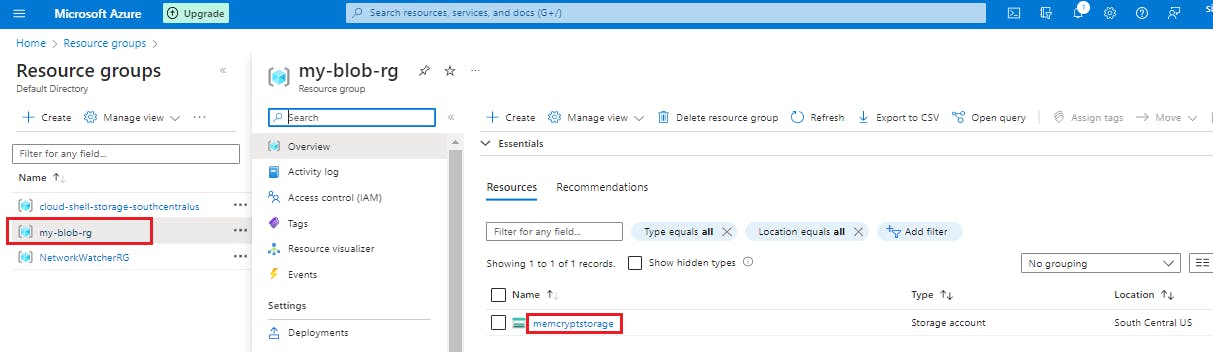
Select Access keys in the Security + networking section of the navigation pane. Here, you can view your account access keys and the complete connection string for each key.
Find the Connection string value under key1, and select the Copy button to copy the connection string. You will add the connection string value to the code in the next section.
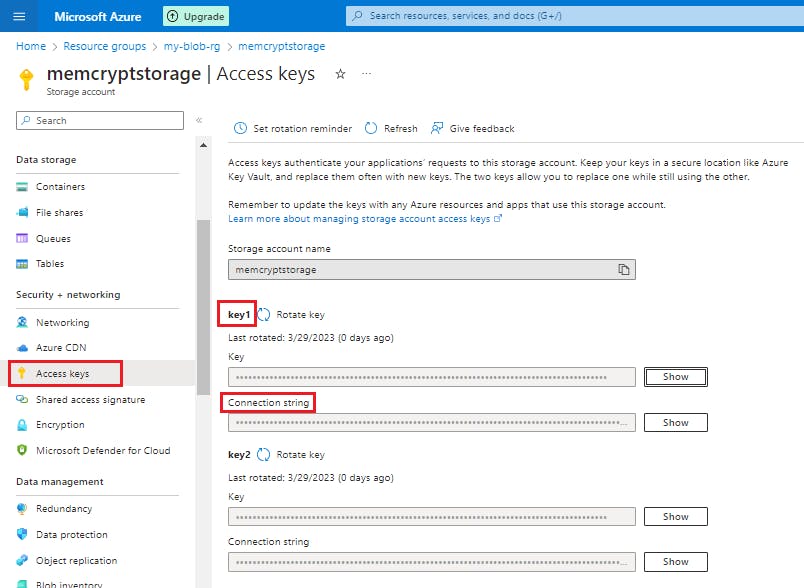
The connection string may have the following format:
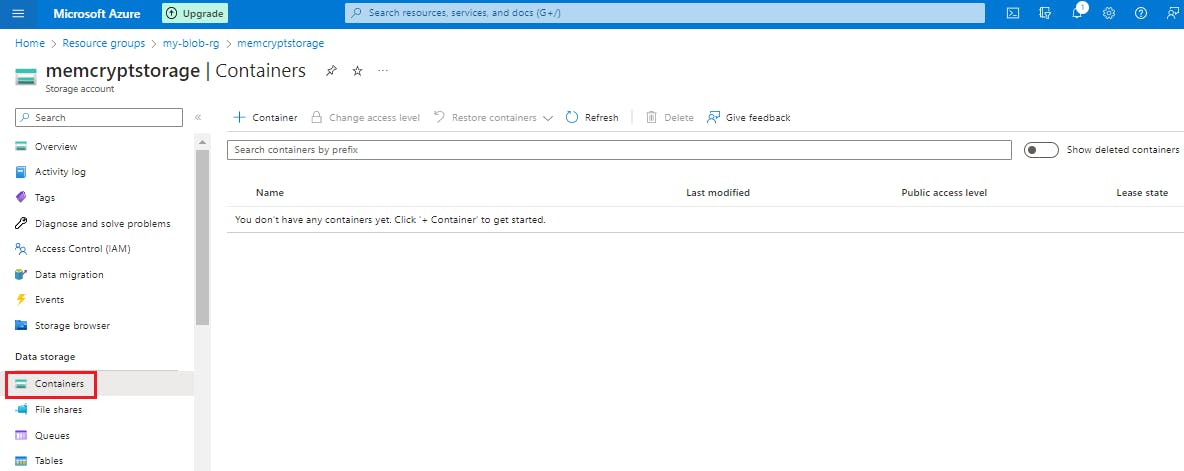
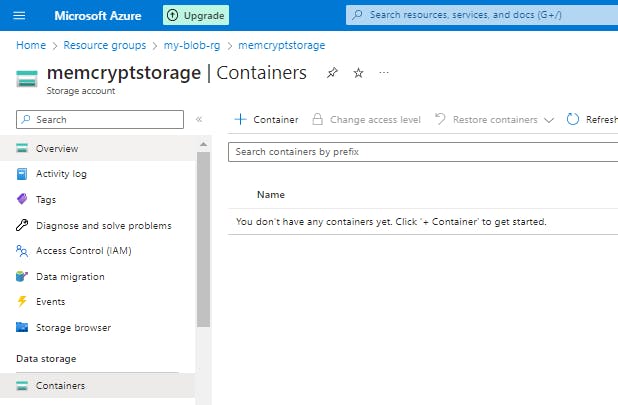
DefaultEndpointsProtocol=https;AccountName=<storage_account_name>;AccountKey=<account_key>;EndpointSuffix=core.windows.netIn the Blob section of the storage account overview, select Containers. Leave the windows open so you can view changes made to the storage as you progress through the exercise.
Step 2: Prepare the .NET project
In this section we'll create project named BlobStorageDemo and install the Azure Blob Storage client library.
In the VS Code terminal navigate to a directory where you want to store your project.
In the terminal, use the
dotnet newcommand to create a new console app. This command creates a simple "Hello World" C# project with a single source file: Program.cs.dotnet new console -n BlobStorageDemo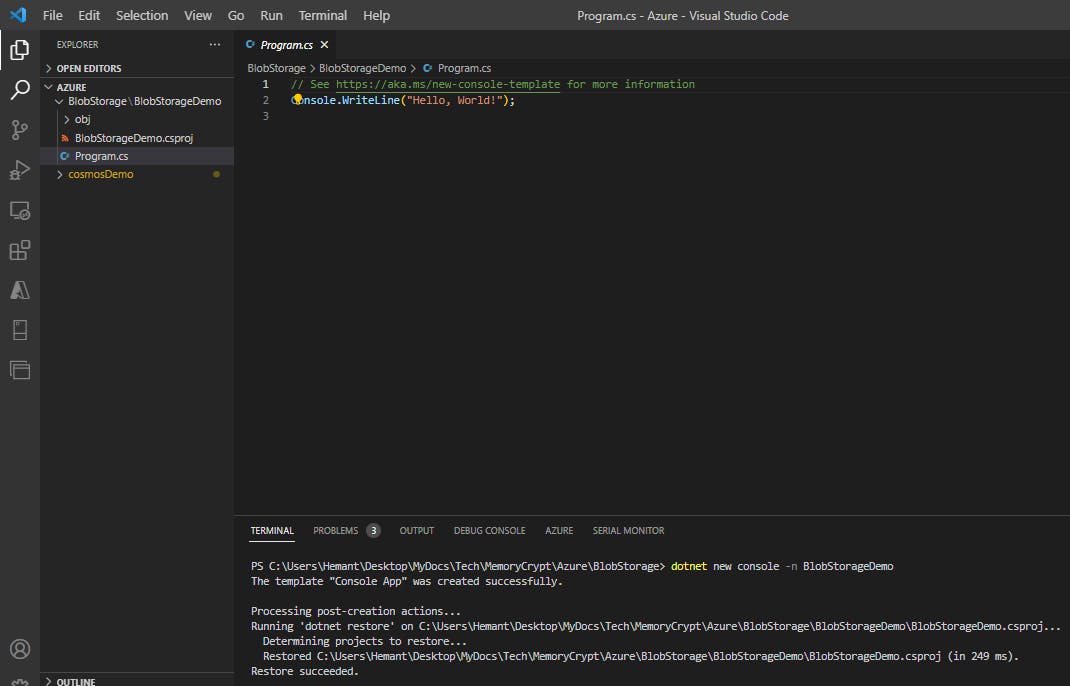
Use the following commands to switch to the newly created BlobStorageDemo folder and build the app to verify that all is well.
 cd BlobStorageDemo
 dotnet build
Inside the BlobStorageDemo folder, create another folder named data. This is where the blob data files will be created and stored.
mkdir data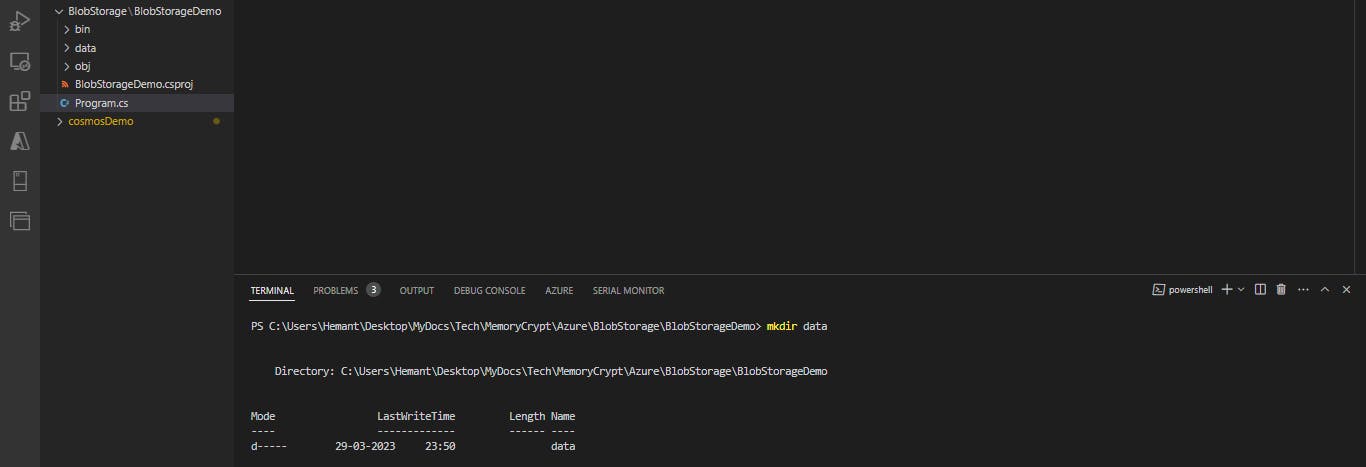
While still in the application directory, install the Azure Blob Storage client library for .NET package by using the
dotnet add packagecommand.BashCopy
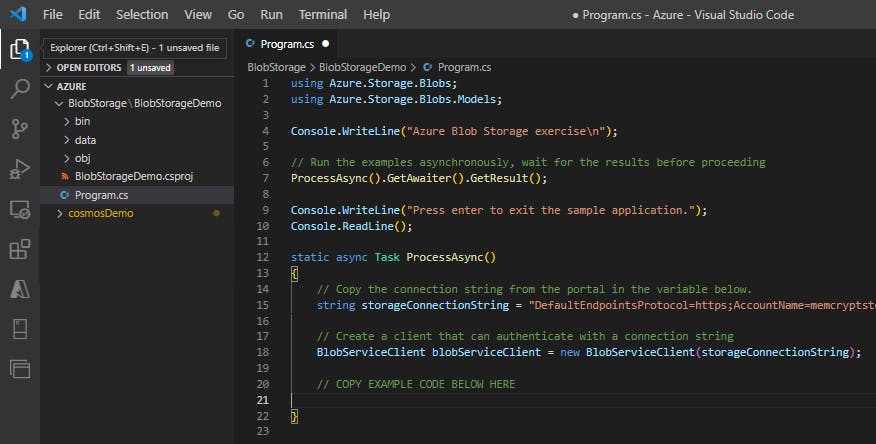
dotnet add package Azure.Storage.BlobsOpen the Program.cs file in your editor, and replace the contents with the following code.
 using Azure.Storage.Blobs;
 using Azure.Storage.Blobs.Models;

 Console.WriteLine("Azure Blob Storage exercise\n");

 // Run the examples asynchronously, wait for the results before proceeding
 ProcessAsync().GetAwaiter().GetResult();

 Console.WriteLine("Press enter to exit the sample application.");
 Console.ReadLine();

 static async Task ProcessAsync()
 {
     // Copy the connection string from the portal in the variable below.
     string storageConnectionString = "CONNECTION STRING";

     // Create a client that can authenticate with a connection string
     BlobServiceClient blobServiceClient = new BlobServiceClient(storageConnectionString);

     // COPY EXAMPLE CODE BELOW HERE

 }
Set the
storageConnectionStringvariable to the value you copied from the portal
Step 3: Build the full app
For each example below copy the code and append it to the previous snippet in the example code section of the Program.cs file.
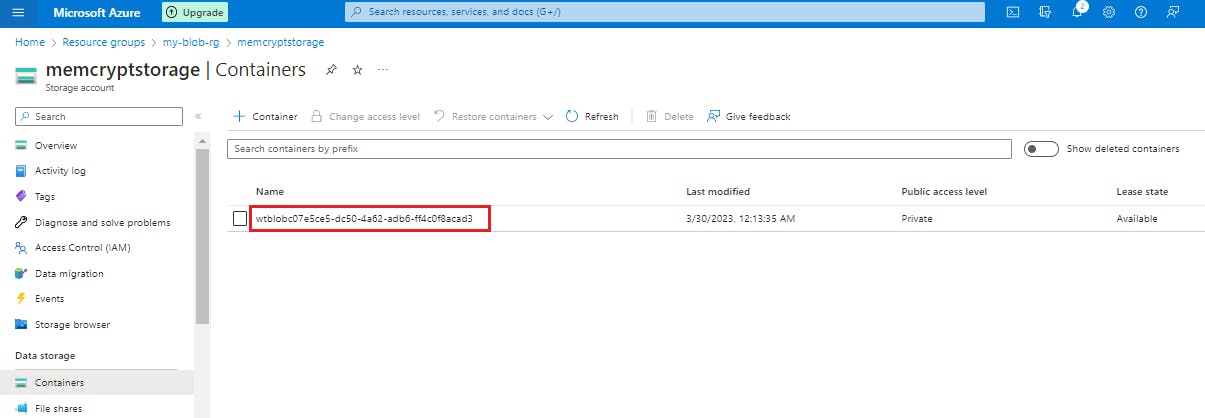
Create a container
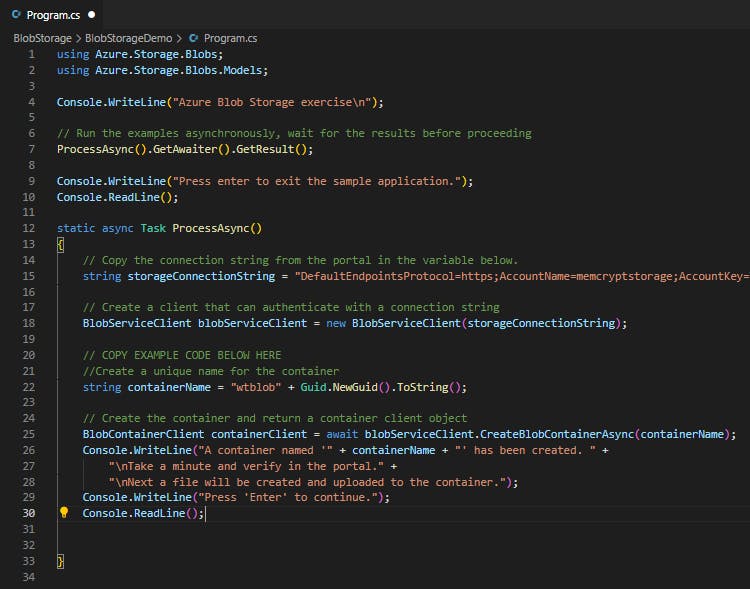
To create the container first create an instance of the BlobServiceClient class, then call the CreateBlobContainerAsync method to create the container in your storage account. A GUID value is appended to the container name to ensure that it is unique. The CreateBlobContainerAsync method will fail if the container already exists.
//Create a unique name for the container
string containerName = "wtblob" + Guid.NewGuid().ToString();

// Create the container and return a container client object
BlobContainerClient containerClient = await blobServiceClient.CreateBlobContainerAsync(containerName);
Console.WriteLine("A container named '" + containerName + "' has been created. " +
    "\nTake a minute and verify in the portal." +
    "\nNext a file will be created and uploaded to the container.");
Console.WriteLine("Press 'Enter' to continue.");
Console.ReadLine();
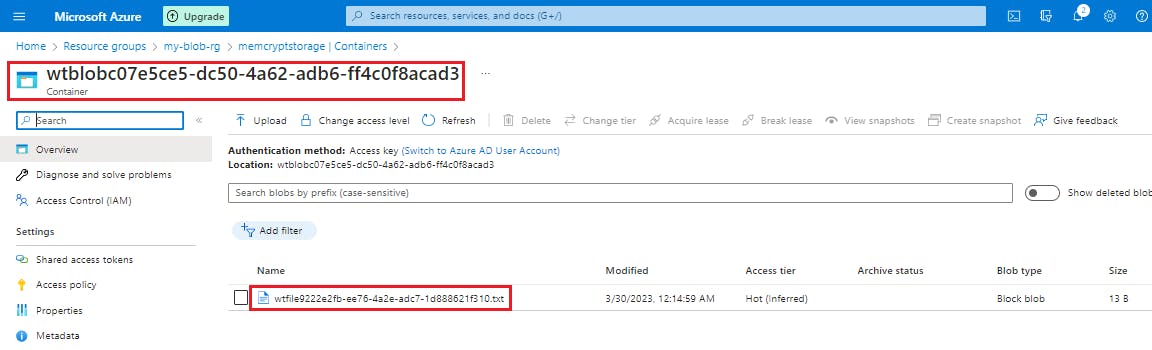
Upload blobs to a container
The following code snippet gets a reference to a BlobClient object by calling the GetBlobClient method on the container created in the previous section. It then uploads the selected local file to the blob by calling the UploadAsync method. This method creates the blob if it doesn't already exist, and overwrites it if it does.
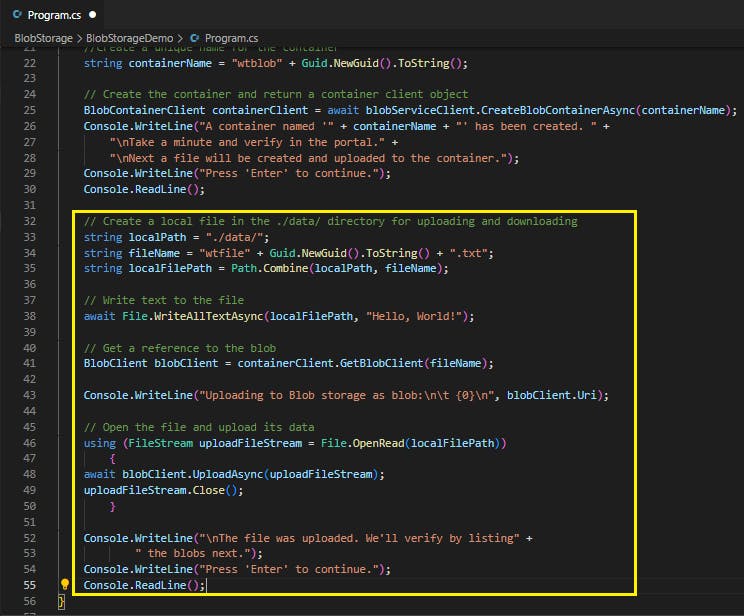
// Create a local file in the ./data/ directory for uploading and downloading
string localPath = "./data/";
string fileName = "wtfile" + Guid.NewGuid().ToString() + ".txt";
string localFilePath = Path.Combine(localPath, fileName);

// Write text to the file
await File.WriteAllTextAsync(localFilePath, "Hello, World!");

// Get a reference to the blob
BlobClient blobClient = containerClient.GetBlobClient(fileName);

Console.WriteLine("Uploading to Blob storage as blob:\n\t {0}\n", blobClient.Uri);

// Open the file and upload its data
using (FileStream uploadFileStream = File.OpenRead(localFilePath))
    {
await blobClient.UploadAsync(uploadFileStream);
uploadFileStream.Close();
    }

Console.WriteLine("\nThe file was uploaded. We'll verify by listing" +
        " the blobs next.");
Console.WriteLine("Press 'Enter' to continue.");
Console.ReadLine();
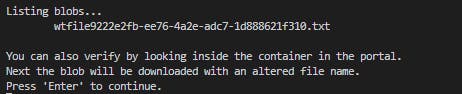
List the blobs in a container
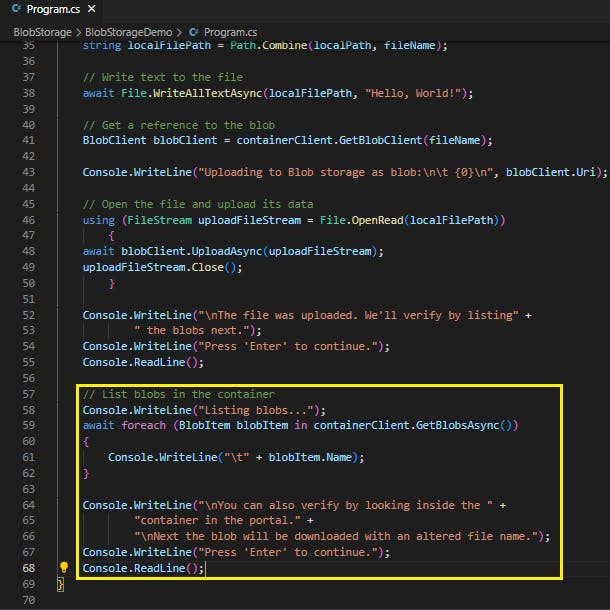
List the blobs in the container by using the GetBlobsAsync method. In this case, only one blob has been added to the container, so the listing operation returns just that one blob.
// List blobs in the container
Console.WriteLine("Listing blobs...");
await foreach (BlobItem blobItem in containerClient.GetBlobsAsync())
{
    Console.WriteLine("\t" + blobItem.Name);
}

Console.WriteLine("\nYou can also verify by looking inside the " +
        "container in the portal." +
        "\nNext the blob will be downloaded with an altered file name.");
Console.WriteLine("Press 'Enter' to continue.");
Console.ReadLine();
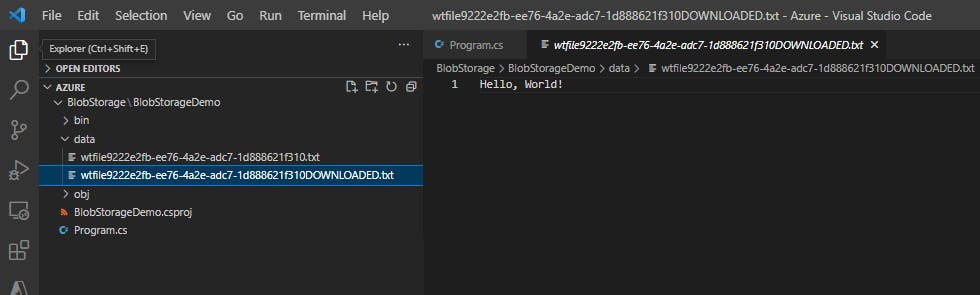
Download blobs
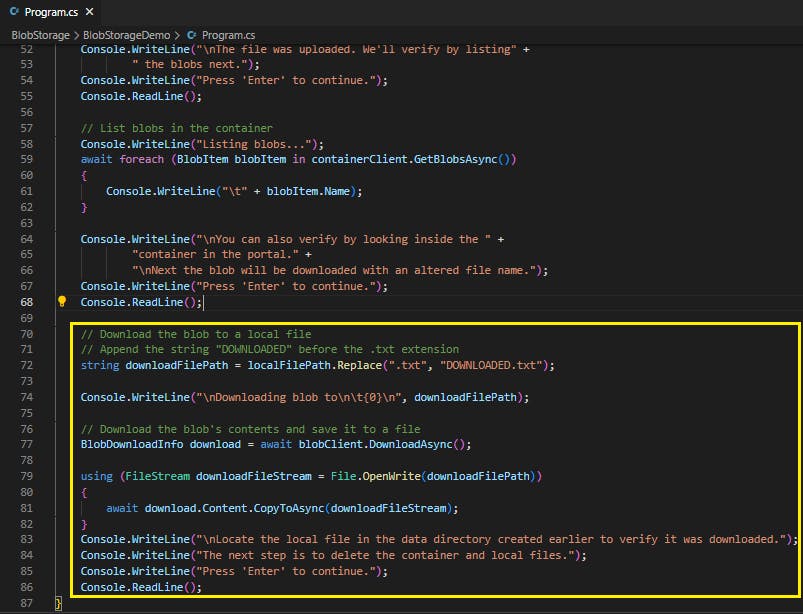
Download the blob created previously to your local file system by using the DownloadAsync method. The example code adds a suffix of "DOWNLOADED" to the blob name so that you can see both files in local file system.
// Download the blob to a local file
// Append the string "DOWNLOADED" before the .txt extension
string downloadFilePath = localFilePath.Replace(".txt", "DOWNLOADED.txt");

Console.WriteLine("\nDownloading blob to\n\t{0}\n", downloadFilePath);

// Download the blob's contents and save it to a file
BlobDownloadInfo download = await blobClient.DownloadAsync();

using (FileStream downloadFileStream = File.OpenWrite(downloadFilePath))
{
    await download.Content.CopyToAsync(downloadFileStream);
}
Console.WriteLine("\nLocate the local file in the data directory created earlier to verify it was downloaded.");
Console.WriteLine("The next step is to delete the container and local files.");
Console.WriteLine("Press 'Enter' to continue.");
Console.ReadLine();
Delete a container
The following code cleans up the resources the app created by deleting the entire container using DeleteAsync. It also deletes the local files created by the app.
// Delete the container and clean up local files created
Console.WriteLine("\n\nDeleting blob container...");
await containerClient.DeleteAsync();

Console.WriteLine("Deleting the local source and downloaded files...");
File.Delete(localFilePath);
File.Delete(downloadFilePath);

Console.WriteLine("Finished cleaning up.");

Step 4: Run the code
Now that the app is complete it's time to build and run it. Ensure you are in your application directory and run the following commands:
dotnet build
dotnet run
There are many prompts in the app to allow you to take the time to see what's happening in the portal after each step.


The file as well as container is now deleted
Step 5: Clean up other resources
The app deleted the resources it created. You can delete all of the resources created for this exercise by using the command below. You will need to confirm that you want to delete the resources.
az group delete --name my-blob-rg --no-wait

Manage container properties and metadata by using .NET
Blob properties and metadata
Blob containers support system properties and user-defined metadata.
System Properties
System properties exist on each Blob storage resource. Some of them can be read or set, while others are read-only. Under the covers, some system properties correspond to certain standard HTTP headers. The Azure Storage client library for .NET maintains these properties for you.
User-defined metadata
User-defined metadata consists of one or more name-value pairs that you specify for a Blob storage resource. You can use metadata to store additional values with the resource. Metadata values are for your own purposes only, and don't affect how the resource behaves.
Retrieve container properties
To retrieve container properties, call one of the following methods of the BlobContainerClient class:
GetPropertiesGetPropertiesAsync
The following code example fetches a container's system properties and writes some property values to a console window:
private static async Task ReadContainerPropertiesAsync(BlobContainerClient container)
{
    try
    {
        // Fetch some container properties and write out their values.
        var properties = await container.GetPropertiesAsync();
        Console.WriteLine($"Properties for container {container.Uri}");
        Console.WriteLine($"Public access level: {properties.Value.PublicAccess}");
        Console.WriteLine($"Last modified time in UTC: {properties.Value.LastModified}");
    }
    catch (RequestFailedException e)
    {
        Console.WriteLine($"HTTP error code {e.Status}: {e.ErrorCode}");
        Console.WriteLine(e.Message);
        Console.ReadLine();
    }
}
Set and retrieve metadata
You can specify metadata as one or more name-value pairs on a blob or container resource. To set metadata, add name-value pairs to an IDictionary object, and then call one of the following methods of the BlobContainerClient class to write the values:
SetMetadataSetMetadataAsync
Metadata names preserve the case with which they were created, but are case-insensitive when set or read. If two or more metadata headers with the same name are submitted for a resource, Blob storage comma-separates and concatenates the two values and returns HTTP response code 200 (OK).
The following code example sets metadata on a container.
public static async Task AddContainerMetadataAsync(BlobContainerClient container)
{
    try
    {
        IDictionary<string, string> metadata =
           new Dictionary<string, string>();

        // Add some metadata to the container.
        metadata.Add("docType", "textDocuments");
        metadata.Add("category", "guidance");

        // Set the container's metadata.
        await container.SetMetadataAsync(metadata);
    }
    catch (RequestFailedException e)
    {
        Console.WriteLine($"HTTP error code {e.Status}: {e.ErrorCode}");
        Console.WriteLine(e.Message);
        Console.ReadLine();
    }
}
The GetProperties and GetPropertiesAsync methods are used to retrieve metadata in addition to properties as shown earlier.
The following code example retrieves metadata from a container.
public static async Task ReadContainerMetadataAsync(BlobContainerClient container)
{
    try
    {
        var properties = await container.GetPropertiesAsync();

        // Enumerate the container's metadata.
        Console.WriteLine("Container metadata:");
        foreach (var metadataItem in properties.Value.Metadata)
        {
            Console.WriteLine($"\tKey: {metadataItem.Key}");
            Console.WriteLine($"\tValue: {metadataItem.Value}");
        }
    }
    catch (RequestFailedException e)
    {
        Console.WriteLine($"HTTP error code {e.Status}: {e.ErrorCode}");
        Console.WriteLine(e.Message);
        Console.ReadLine();
    }
}
Set and retrieve properties and metadata for blob resources by using REST
Containers and blobs support custom metadata, represented as HTTP headers. Metadata headers can be set on a request that creates a new container or blob resource, or on a request that explicitly creates a property on an existing resource.
Metadata header format
Metadata headers are name/value pairs. The format for the header is:
x-ms-meta-name:string-value
Names are case-insensitive. Note that metadata names preserve the case with which they were created, but are case-insensitive when set or read. If two or more metadata headers with the same name are submitted for a resource, the Blob service returns status code 400 (Bad Request).
The metadata consists of name/value pairs. The total size of all metadata pairs can be up to 8KB in size.
Metadata name/value pairs are valid HTTP headers, and so they adhere to all restrictions governing HTTP headers.
Operations on metadata
Metadata on a blob or container resource can be retrieved or set directly, without returning or altering the content of the resource.
Note that metadata values can only be read or written in full; partial updates are not supported. Setting metadata on a resource overwrites any existing metadata values for that resource.
Retrieving properties and metadata
The GET and HEAD operations both retrieve metadata headers for the specified container or blob. These operations return headers only; they do not return a response body. The URI syntax for retrieving metadata headers on a container is as follows:
GET/HEAD https://myaccount.blob.core.windows.net/mycontainer?restype=container
The URI syntax for retrieving metadata headers on a blob is as follows:
GET/HEAD https://myaccount.blob.core.windows.net/mycontainer/myblob?comp=metadata
Setting Metadata Headers
The PUT operation sets metadata headers on the specified container or blob, overwriting any existing metadata on the resource. Calling PUT without any headers on the request clears all existing metadata on the resource.
The URI syntax for setting metadata headers on a container is as follows:
PUT https://myaccount.blob.core.windows.net/mycontainer?comp=metadata&restype=container
The URI syntax for setting metadata headers on a blob is as follows:
PUT https://myaccount.blob.core.windows.net/mycontainer/myblob?comp=metadata
Standard HTTP properties for containers and blobs
Containers and blobs also support certain standard HTTP properties. Properties and metadata are both represented as standard HTTP headers; the difference between them is in the naming of the headers. Metadata headers are named with the header prefix x-ms-meta- and a custom name. Property headers use standard HTTP header names, as specified in the Header Field Definitions section 14 of the HTTP/1.1 protocol specification.
The standard HTTP headers supported on containers include:
ETagLast-Modified
The standard HTTP headers supported on blobs include:
ETagLast-ModifiedContent-LengthContent-TypeContent-MD5Content-EncodingContent-LanguageCache-ControlOriginRangeUp Next - User Authentication and Authorization - Developing Solutions for Microsoft Azure - Part 3.1